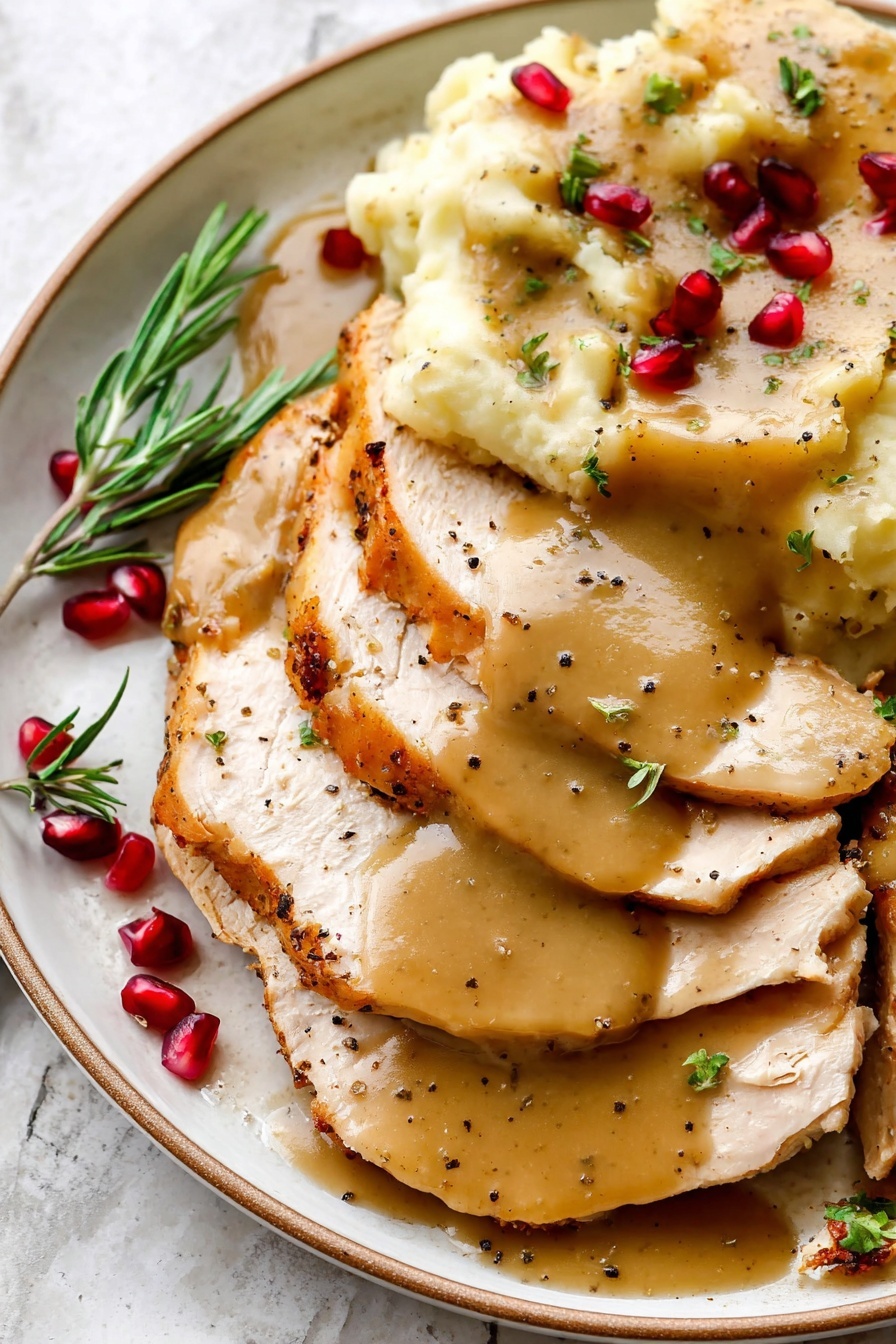
There’s something deeply satisfying about making your own gravy, especially when it’s crafted from those rich, flavorful turkey drippings. This Homemade Turkey Gravy from Drippings Recipe captures everything that makes me smile at the dinner table—a silky texture, deep taste, and just the right amount of seasoning that brings the whole meal together.

Jump to:
- Why You'll Love This Recipe
- Ingredients & Why They Work
- Make It Your Way
- Step-by-Step: How I Make Homemade Turkey Gravy from Drippings Recipe
- Top Tip
- How to Serve Homemade Turkey Gravy from Drippings Recipe
- Make Ahead and Storage
- Frequently Asked Questions:
- Final Thoughts
- Homemade Turkey Gravy from Drippings Recipe
Why You'll Love This Recipe
I honestly think gravy is the unsung hero of any turkey dinner, and making it from the drippings feels like unlocking a secret layer of flavor that you just can't get from jarred gravy. I love how comforting and nostalgic this Homemade Turkey Gravy from Drippings Recipe is—it’s pure kitchen magic.
- Pure Flavor: Using the turkey drippings means your gravy inherits all those roasted, meaty notes straight from your bird.
- Simple Technique: With just a few ingredients and basic steps, you’ll get a smooth, delicious gravy without any guesswork.
- Customizable Seasonings: You can tweak flavors to match your taste or your turkey’s seasoning, making it uniquely yours every time.
- Perfect Texture Control: Whisk, simmer, and adjust the thickness so it pours beautifully over every part of your plate.
Ingredients & Why They Work
The beauty of this recipe is in how a small handful of ingredients come together to make something so rich and comforting. Choosing the right butter and flour, plus those precious turkey drippings, sets the stage for a gravy that’s smooth and bursting with savory goodness.
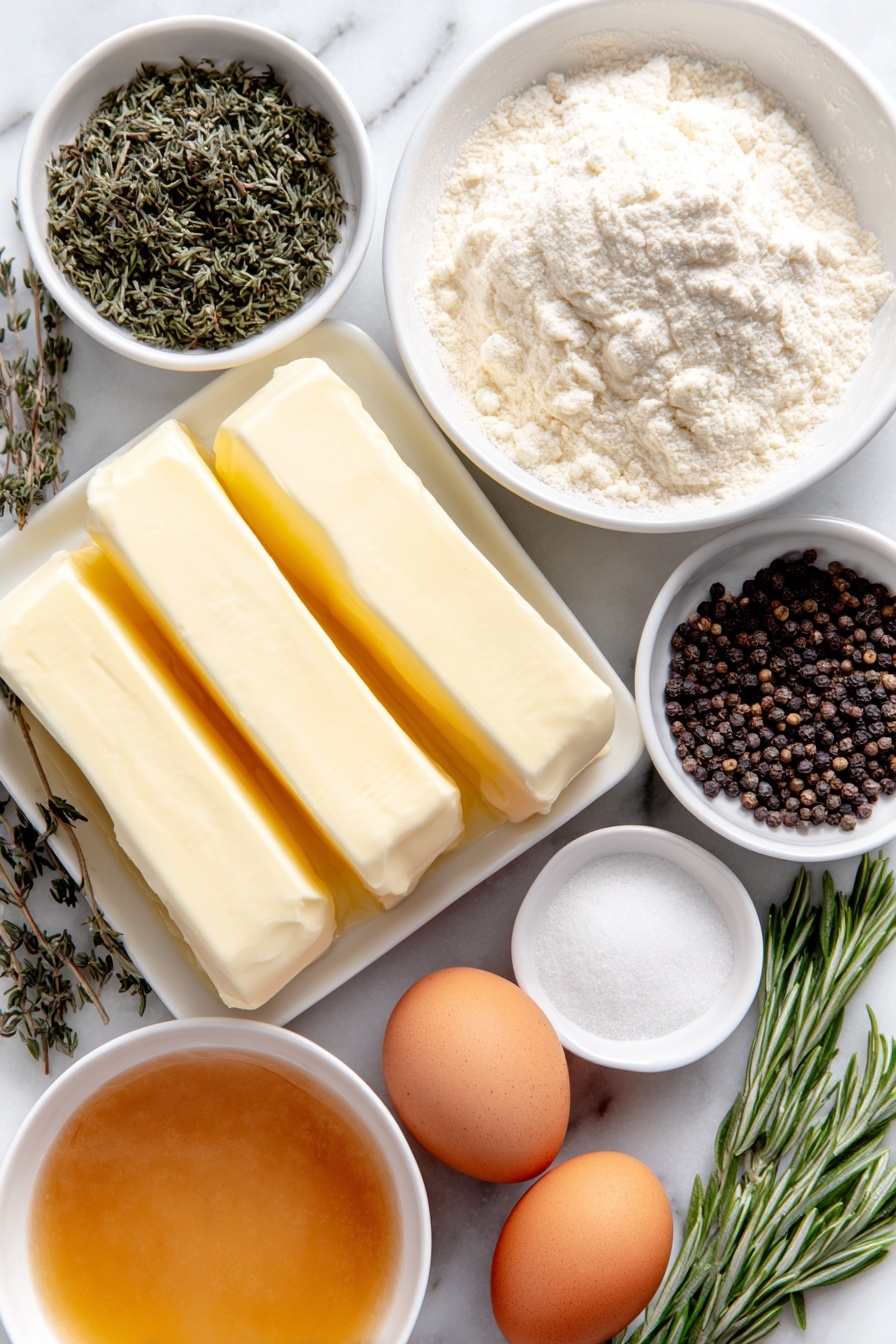
- Unsalted butter: Using unsalted lets you control the seasoning; its richness is essential for that silky roux base.
- Flour: This is your thickening agent—be sure to cook it well to get golden color and avoid a floury taste.
- Turkey drippings: These carry the deep, roasted turkey flavor—don’t throw away those tasty pan juices!
- Water: To top up the liquid so you get the perfect volume and consistency.
- Granulated chicken bouillon (optional): A great way to boost umami and saltiness gently without overwhelming the drippings.
- Dried herbs & spices: Parsley, thyme, garlic powder, sage, rosemary, onion powder, and pepper add warmth and complexity.
Make It Your Way
I love to play around with the herbs in this gravy depending on the season or what the turkey’s been seasoned with. Sometimes I add a touch of fresh sage or even a splash of a good dry white wine to amp up the depth. You should definitely feel free to tailor this gravy to your own taste buds.
- Variation: One time I swapped some of the turkey drippings with low-sodium chicken broth when I felt the drippings were too concentrated—worked like a charm and still packed plenty of flavor.
Step-by-Step: How I Make Homemade Turkey Gravy from Drippings Recipe
Step 1: Strain and Separate Your Drippings
Once your turkey is out of the roasting pan and resting, pour those glorious pan juices through a fine mesh sieve into a fat separator or a large freezer bag. I like using the bag method because it’s so easy to catch the separated fat—you just let it sit and carefully pour the lean liquid out from the bottom corner. You want about 4 cups of drippings for this recipe, so top it off with some water if you need to.
Step 2: Make Your Roux
In a large saucepan over medium-low heat, melt the butter and add the flour. This step is key because cooking the flour until it’s a deep golden color prevents the dreaded lumps and gives your gravy that beautiful nutty flavor. Keep whisking for 4-5 minutes—you can’t rush this!
Step 3: Slowly Whisk in the Drippings
Lower the heat a bit and gradually whisk your drippings into the roux. This slow incorporation helps avoid lumps and creates that silky smooth texture we want. Whisk until everything is combined and the gravy looks glossy.
Step 4: Simmer and Season
Bring your gravy to a gentle simmer, whisking constantly. It should thicken within 6-8 minutes. Remember, it’s going to thicken more once off the heat, so aim for slightly looser than your desired consistency. Taste your gravy and adjust with salt, chicken bouillon, and herbs a pinch at a time. This is where you make it truly your own.
Step 5: Keep Warm and Serve
Gravy is best served warm and smooth, so keep it on low heat stirring occasionally if you need to hold it for a bit. I like to pour it into an insulated gravy jug to keep it perfect for serving—and watch everyone reach for seconds!
Top Tip
From many a turkey dinner, I’ve learned that timing and attention to detail make all the difference with this Homemade Turkey Gravy from Drippings Recipe. The little tricks I share below saved me from clumpy or bland gravy—and they’ll help you get it right every time.
- Perfect Roux Color: Don’t rush cooking the flour; a deep golden color adds flavor and stops lumps before they start.
- Fat Separation: Using a fat separator or the freezer bag method ensures your gravy isn’t greasy but still richly flavored.
- Season in Layers: Add seasoning gradually and taste often, especially because drippings vary between turkeys.
- Adjust Consistency: If your gravy thickens too much after resting, warm it gently and whisk in water a tablespoon at a time to soften it.
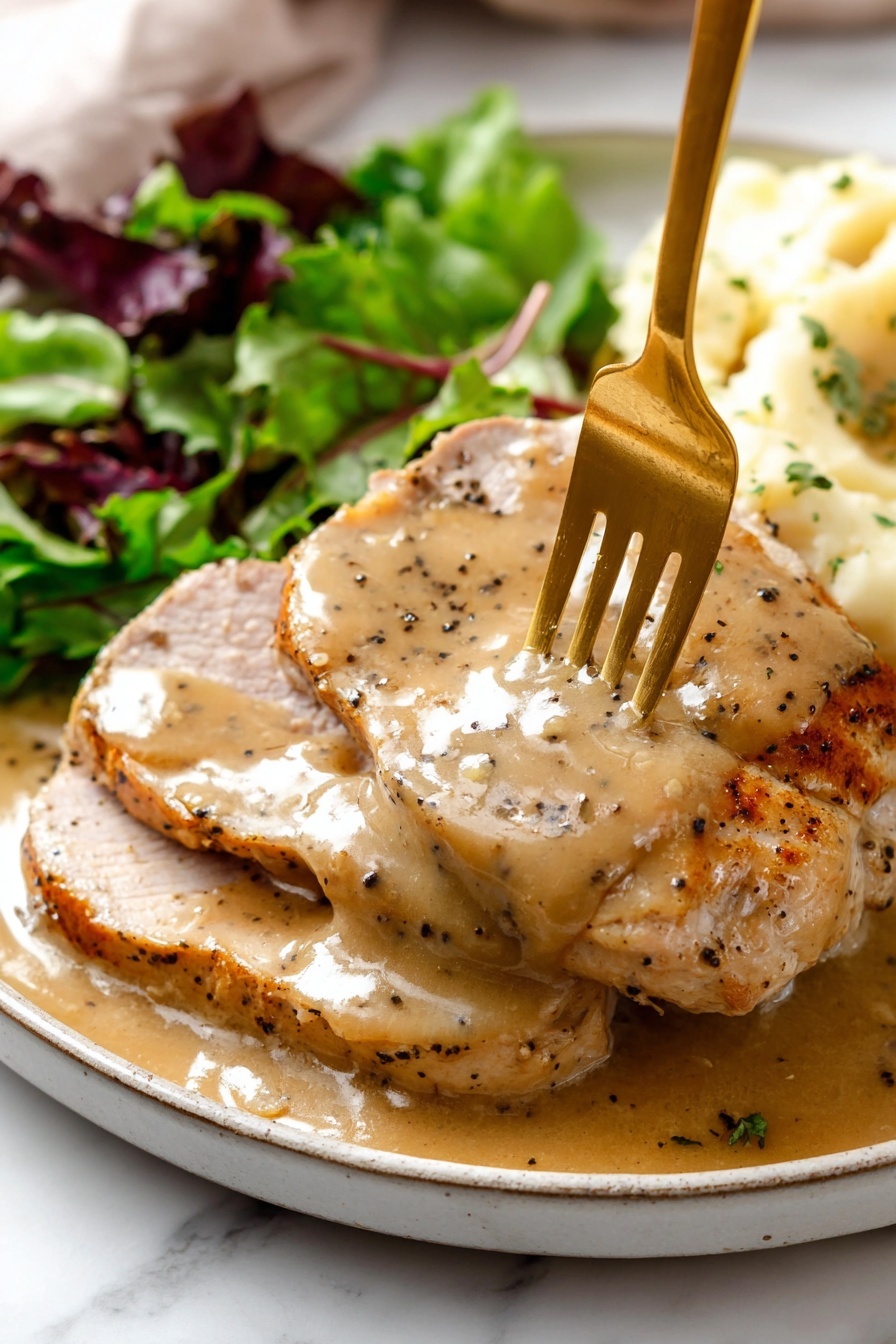
How to Serve Homemade Turkey Gravy from Drippings Recipe
Garnishes
I usually keep garnishes simple—a sprinkle of fresh parsley or a few finely chopped chives right before serving brightens the gravy visually and adds a nice little herbal punch. Sometimes a twist of black pepper on top finishes it off beautifully.
Side Dishes
This homemade gravy shines dripping over roasted turkey, mashed potatoes, stuffing, and even green bean casserole. It’s the glue that unites all those comforting sides with your star of the plate—the turkey.
Creative Ways to Present
For special occasions, I love serving gravy in a beautiful vintage gravy boat, surrounded by fresh thyme sprigs. It adds a rustic, elegant touch that guests always notice. Another fun idea is to keep gravy warm in a small slow cooker with a ladle beside it for casual buffets.
Make Ahead and Storage
Storing Leftovers
After everyone’s enjoyed their fill, I pour leftover gravy into an airtight container and pop it in the fridge. It keeps well for up to 4 days, making easy weeknight reheating a breeze.
Freezing
I’ve frozen leftover gravy in smaller portions using freezer bags, squeezing out all the air. It holds up nicely for up to 3 months—perfect for quick meals or when you want a taste of that holiday comfort without the fuss.
Reheating
When it’s time to eat again, I reheat gently on the stove over medium-low heat, stirring constantly. If it thickens too much, a splash of water or broth thins it back to that luscious, pourable texture.
Frequently Asked Questions:
Absolutely! You can prepare the gravy a few hours ahead and keep it warm on low heat, or make it a day prior, then reheat gently and adjust thickness with water if needed.
If you find yourself short on drippings, simply top up the liquid with good-quality chicken broth or water. This keeps the flavor balanced without diluting it too much.
The key is cooking the roux until it turns golden and whisking liquids in slowly. Constant whisking and patience prevent lumps from forming.
Definitely—this gravy is a flexible base. Add herbs and spices incrementally, tasting as you go, so you get it just right for your turkey and personal preferences.
Final Thoughts
Honestly, this Homemade Turkey Gravy from Drippings Recipe feels like the heart of the holiday table to me. It’s dependable, comforting, and always gets those smiles around the dinner plate. Try it the next time you roast a turkey—you’ll be amazed how something so simple elevates your entire meal.
Print
Homemade Turkey Gravy from Drippings Recipe
- Prep Time: 5 minutes
- Cook Time: 15 minutes
- Total Time: 20 minutes
- Yield: 2.5 cups
- Category: Sauce
- Method: Stovetop
- Cuisine: American
Description
This homemade turkey gravy recipe offers two easy methods: one using flavorful turkey drippings and another without drippings using chicken broth. Both methods create a smooth, rich gravy perfect for complementing your holiday turkey or any poultry dish. The gravy is thickened with a golden roux and seasoned to taste, allowing flexibility and delicious results every time.
Ingredients
Turkey Gravy with Drippings
- 6 tablespoons unsalted butter
- ⅓ cup plus 1 tablespoon flour
- 4 cups turkey drippings plus water as needed
- Granulated chicken bouillon, as needed (optional)
- Seasonings as needed (dried parsley, garlic powder, onion powder, dried thyme, ground sage, dried minced rosemary, pepper)
Turkey Gravy Without Drippings
- 6 tablespoons unsalted butter
- ⅓ cup plus 1 tablespoon flour
- 4 cups reduced sodium chicken broth
- 1 teaspoon chicken bouillon (granulated, crushed cube or base)
- 1 teaspoon dried parsley
- ½ teaspoon garlic powder
- ¼ teaspoon onion powder
- ¼ teaspoon dried thyme
- ¼ teaspoon pepper
- ⅛ teaspoon ground sage
- ⅛ teaspoon dried minced rosemary
- Salt to taste
Instructions
- Strain: Strain the turkey drippings from the roasting pan through a fine mesh sieve into a fat separator or large freezer bag, discarding solids caught in the sieve.
- Degrease: Let the drippings rest to separate fat and remove fat by cutting a corner of the freezer bag to pour liquid into a measuring cup, stopping before the fat flows out, to get 4 cups of liquid.
- Make 4 cups liquid: Add water if needed to make total 4 cups of liquid drippings.
- Make roux: Melt butter in a large saucepan over medium-low heat. Add flour and cook while whisking constantly for 4-5 minutes until deeply golden. Reduce heat to low and slowly whisk in the turkey drippings, ensuring no lumps form.
- Simmer: Bring the mixture to a simmer while whisking constantly and cook for 6-8 minutes until thickened to desired consistency, adding water if it becomes too thick.
- Season: Taste and add granulated chicken bouillon a quarter teaspoon at a time if more salt is needed, then add seasonings like dried parsley, garlic powder, onion powder, dried thyme, ground sage, rosemary, and pepper as desired.
- Keep warm: Keep the gravy on low heat, stirring often to maintain smoothness until ready to serve. Serve warm in an insulated gravy jug if possible.
- Thin as needed: If gravy thickens as it cools, reheat gently over medium-low heat and whisk in additional water to reach desired consistency.
- For gravy without drippings - make roux: Melt butter over medium-low heat; add flour and cook whisking constantly for 4-5 minutes until golden.
- Add broth and seasonings: Reduce heat to low and slowly whisk in chicken broth, then add chicken bouillon and all seasonings. Whisk until smooth.
- Simmer and thicken: Bring to simmer while whisking constantly for 6-8 minutes until thickened.
- Season and keep warm: Adjust salt and pepper to taste, keep warm on low heat, stirring often until serving time. Thin with water if necessary when reheating.
Notes
- Store leftover gravy in an airtight container in the refrigerator for up to 4 days.
- Freeze leftover gravy in airtight containers or freezer bags for up to 3 months; thaw overnight in refrigerator before reheating.
- Reheat gravy gently on stovetop, adding water as needed to thin to desired consistency, whisking until smooth.
- Do not skip cooking the roux thoroughly for 4-5 minutes until deeply golden to avoid lumps.
- Using fat separator or freezer bag method to remove fat helps create a smooth, less greasy gravy.
- Season gradually and taste frequently as drippings vary greatly in saltiness and flavor.
- Keep gravy warm before serving to maintain smooth texture as it thickens when cooled.
Nutrition
- Serving Size: ¼ cup
- Calories: 90 kcal
- Sugar: 0 g
- Sodium: 200 mg
- Fat: 6 g
- Saturated Fat: 3.5 g
- Unsaturated Fat: 2 g
- Trans Fat: 0 g
- Carbohydrates: 7 g
- Fiber: 0 g
- Protein: 1 g
- Cholesterol: 15 mg


Leave a Reply