There’s something so nostalgic about biting into a soft, sweet treat sprinkled with festive colors. My Classic Christmas Sugar Cookies Recipe is one of those timeless classics that fills your kitchen with the warmest holiday vibes. Trust me, these cookies aren’t just pretty—they’re downright addictive, and kids and adults alike will be asking for seconds.

Jump to:
Why You'll Love This Recipe
I've made a lot of sugar cookie recipes over the years, but this one always stands out during the holidays. It’s the perfect balance of buttery, tender dough with just the right hint of vanilla and almond. Plus, decorating them is half the fun, making holiday baking a true family affair.
- Perfect Soft Texture: Thanks to cream cheese and butter working together, these cookies stay soft and tender without being cakey.
- Simple Ingredients: All pantry staples that you probably already have on hand, making it easy to whip up anytime.
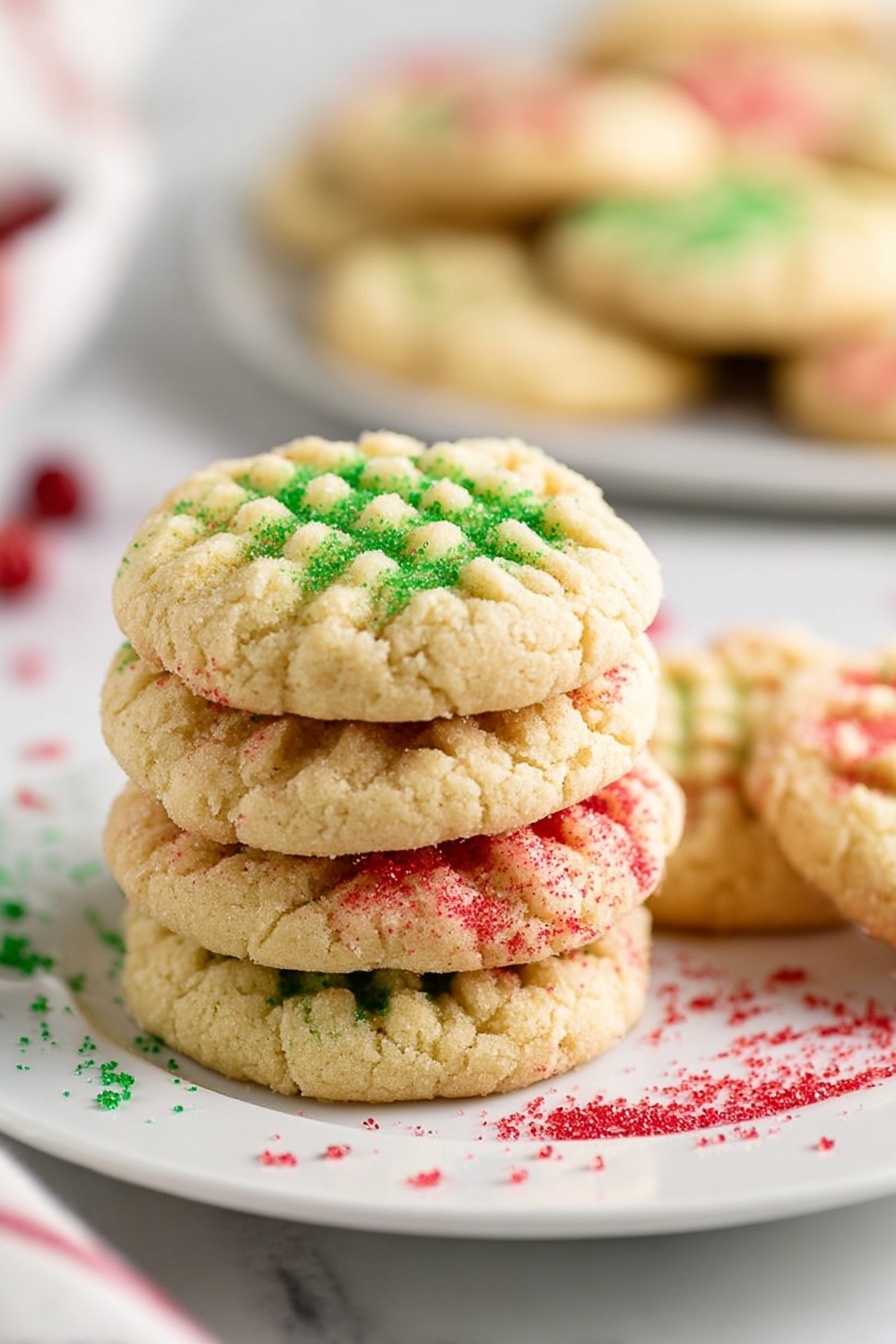
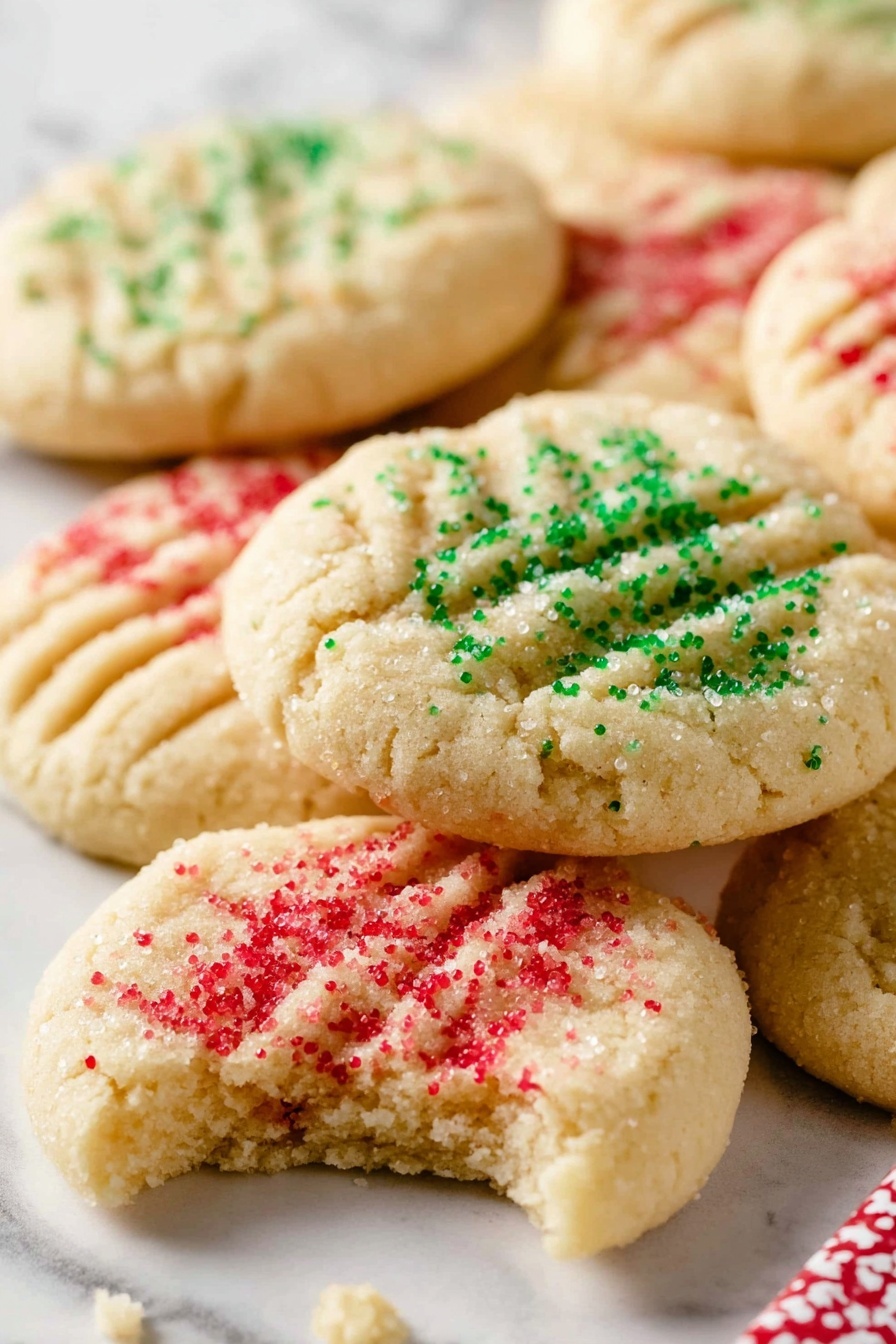
- Festive Decorating: The red and green sanding sugar adds vibrant sparkle with minimal effort.
- Make-Ahead Friendly: The dough chills beautifully, so you can prep in advance and bake fresh when you need them.
Ingredients & Why They Work
Let’s talk about the magic behind this Classic Christmas Sugar Cookies Recipe. Each ingredient plays a role to make the texture just right and the flavor irresistibly festive. Here’s why I love these choices and some tips on picking the best ingredients.

- Salted Butter: Adds richness and moisture; I always use real butter for that cozy, rich flavor.
- Cream Cheese: This is the secret weapon—it keeps the cookies super soft and adds a subtle tang that balances sweetness.
- Sugar: Regular granulated sugar works perfectly for that sweet, classic taste and slight crunch.
- Eggs: They bind everything together and add tenderness.
- Vanilla Extract: A must-have for warm, holiday aroma.
- Almond Extract: A small amount adds festive sophistication without overpowering.
- All-Purpose Flour: The sturdy base gives structure but still lets the cookies stay soft.
- Cornstarch: Helps keep them tender and prevents toughness.
- Baking Soda: A little lift and spread for perfect cookie thickness.
- Salt: Enhances all the sweet and buttery notes.
- Red & Green Sanding Sugar: For that unmistakable Christmas sparkle and crunch.
Make It Your Way
One of the things I love about this Classic Christmas Sugar Cookies Recipe is how easy it is to make your own. I often switch up the extracts or add fun toppings depending on my mood or the occasion. Feel free to experiment—you’ll find your family’s favorites in no time.
- Variation: I sometimes swap out almond extract for peppermint extract to give these cookies a fresh, minty holiday twist—super fun and so festive!
- Dietary modifications: Using gluten-free flour blends can work, but watch the texture; adding a bit more cornstarch helps keep them tender.
- Decorating: Try dipping half the cookie in melted chocolate and sprinkle with crushed candy canes for a stunning presentation.
Step-by-Step: How I Make Classic Christmas Sugar Cookies Recipe
Step 1: Creaming the butter, cream cheese and sugar until fluffy
This step is where the magic begins. Make sure your butter and cream cheese are fully softened—room temperature is key—to avoid lumps. I like to use a hand mixer for about 4 to 5 minutes until the mixture is light and fluffy. This really helps give your cookies that melt-in-your-mouth texture.
Step 2: Adding eggs and extracts
Next, add your eggs one at a time, mixing well after each addition. Then, stir in the vanilla and almond extracts. These little bursts of flavor really bring the cookies to life, so don't skip them!
Step 3: Incorporating dry ingredients gently
Slowly add in the flour, cornstarch, baking soda, and salt on a low mixer setting or fold with a spatula to avoid overmixing. You want a soft dough that holds together but isn’t too stiff.
Step 4: Chilling the dough
Cover the bowl with plastic wrap and pop it into the fridge for at least 2 hours. I find chilling is essential for easier rolling and shaping, plus it helps the flavors meld beautifully. This also prevents spreading during baking so your cookies keep their shape.
Step 5: Shaping and decorating
When ready to bake, preheat your oven to 350°F and line a baking sheet with parchment paper. Roll the dough into evenly sized balls—you can use a cookie scoop for this. Place them at least an inch apart. Press a fork gently in a crisscross pattern, then sprinkle on your festive red and green sanding sugar for that holiday sparkle.
Step 6: Baking to perfection
Bake for 9 to 11 minutes. Here’s the trick: you don’t want these cookies to brown on the edges at all. Pull them out when they still look just a bit undercooked in the center—they’ll firm up as they cool. Trust me, that’s how you get soft, tender cookies.
Step 7: Cooling and enjoying
Let them cool on the baking sheet for about 5 minutes before moving to a wire rack. This helps them settle without breaking apart. Then, it’s time to sneak a bite!
Top Tip
I’ve baked so many batches of sugar cookies that I’ve learned a few secrets that really make a difference. The cream cheese is a total game-changer and chilling the dough is non-negotiable for me. Here are some of my absolute best tips to help your cookies turn out perfect every time.
- Fully soften your dairy: I always leave butter and cream cheese out for at least an hour before mixing. No lumps means smoother dough and better texture.
- Don’t skip the chill time: I’ve tried rushing this—it just doesn’t work. The 2-hour chill keeps the dough a manageable consistency and improves flavor blending.
- Underbake slightly: It’s tempting to wait until they look totally done, but I pull mine when they’re just set in the center to keep that soft texture.
- Use a cookie scoop: For uniform cookie sizes, I swear by this—plus it speeds up shaping.
How to Serve Classic Christmas Sugar Cookies Recipe
Garnishes
I usually stick with the classic red and green sanding sugar because it adds just the right sparkle and festive crunch. Sometimes, for my holiday parties, I’ll drizzle some melted white chocolate and sprinkle crushed peppermint on top. It’s a simple touch that always wows guests and adds a delightful variation.
Side Dishes
These cookies pair wonderfully with a warm mug of spiced hot cocoa or a cup of freshly brewed coffee. If you’re serving a bigger holiday spread, they’re a sweet complement to more savory bites like cheese plates or spiced nuts.
Creative Ways to Present
For gatherings, I love arranging the cookies on tiered cake stands, interspersed with pine branches or cinnamon sticks for a rustic holiday look. Wrapping them in cellophane bags tied with ribbon also makes them perfect for gifting to friends and neighbors.
Make Ahead and Storage
Storing Leftovers
These cookies keep wonderfully in an airtight container at room temperature for up to a week. I usually stack them between layers of parchment paper to prevent sticking and keep that tender texture intact.
Freezing
I’ve frozen both the dough and baked cookies with great success. For the dough, shape it into a log, wrap tightly in plastic, and freeze for up to three months. When you’re ready, just thaw overnight in the fridge. Baked cookies freeze well too—store them in a freezer-safe container and thaw at room temperature when you want a treat.
Reheating
If you want to enjoy these cookies warm, a quick 5-10 seconds in the microwave works wonders. Just be careful not to overdo it, or they might get too soft and fall apart.
Frequently Asked Questions:
You can, but the cream cheese adds a unique softness and slight tang that’s hard to replicate. If you omit it, your cookies might be less tender and a bit drier. If dairy is an issue, try substituting with softened vegan cream cheese for a similar texture.
Chilling the dough for at least two hours is your best defense against spreading. Also, make sure your butter and cream cheese aren’t too soft or melting before mixing—softened, not melted! Using parchment paper or silicone mats for baking helps keep control as well.
Absolutely! These cookies hold up well under royal icing. Just be sure they’re completely cooled before decorating to avoid melting the icing. This classic sugar cookie dough is sturdy yet tender enough to support detailed designs.
Stored in an airtight container at room temperature, these cookies stay fresh for about 5 to 7 days. For longer storage, freezing the baked cookies is a great option that retains flavor and texture for up to 3 months.
Final Thoughts
This Classic Christmas Sugar Cookies Recipe has been a staple in my holiday baking for years—and one I always recommend to friends looking for a reliable, fuss-free cookie that tastes incredible. With just a few simple ingredients and a little patience, you’ll have a batch of soft, festive cookies that bring smiles all around. So go ahead, get cozy in the kitchen, and make these your holiday tradition too—you’ll be so glad you did!
Print
Classic Christmas Sugar Cookies Recipe
- Prep Time: 10 minutes
- Cook Time: 11 minutes
- Total Time: 2 hours 21 minutes
- Yield: 36 cookies
- Category: Dessert
- Method: Baking
- Cuisine: American
Description
Classic Christmas Cookies are soft, buttery treats flavored with vanilla and almond extracts and topped with festive red and green sanding sugar, perfect for holiday celebrations and cookie exchanges.
Ingredients
Dairy & Eggs
- 1 stick salted butter softened
- 2 ounces cream cheese softened
- 2 large eggs
Sugars & Extracts
- 1½ cups sugar
- 1½ teaspoon vanilla extract
- ¼ teaspoon almond extract
- Red & Green Sanding Sugar
Dry Ingredients
- 2½ cups all-purpose flour
- 1 tablespoon cornstarch
- 1 teaspoon baking soda
- ¼ teaspoon salt
Instructions
- Mix Wet Ingredients: In a large bowl, add the softened butter, cream cheese, sugar, eggs, vanilla extract, and almond extract. Beat with a hand mixer on medium-high speed until light and fluffy, about 4-5 minutes.
- Add Dry Ingredients: Using a rubber spatula, scrape down the sides of the bowl. Add the all-purpose flour, cornstarch, baking soda, and salt. Turn the hand mixer to a low speed and combine until a soft dough forms.
- Chill Dough: Cover the bowl with plastic wrap and refrigerate the dough for 2 hours to firm up and develop flavor.
- Preheat Oven and Prepare Baking Sheet: Preheat the oven to 350 degrees Fahrenheit. Line a baking sheet with parchment paper and set aside.
- Shape Cookies: Scoop dough into balls using a cookie scoop or spoon, placing them at least 1 inch apart on the prepared baking sheet.
- Decorate: Using a fork, gently press a criss-cross pattern on each cookie ball. Sprinkle the tops with red and green sanding sugar for a festive touch.
- Bake: Bake the cookies in the preheated oven at 350 degrees Fahrenheit for 11 minutes. Avoid overbaking; cookies should look slightly undercooked and should not brown on the edges.
- Cool: Allow the cookies to cool on the baking sheet for 5 minutes, then transfer to a wire rack to cool completely before serving.
Notes
- Soften the butter and cream cheese fully before mixing to avoid lumps in the dough.
- Remove cookies from the oven when they are slightly underbaked; they will firm up as they cool, ensuring a soft texture.
- Use a cookie scoop for uniform cookie sizes and perfect round shapes.
- Line baking pans with parchment paper or silicone mats to prevent sticking and facilitate easy cleanup.
- Store cookies in an airtight container at room temperature for 5-7 days.
- Reheat cookies in the microwave for 5-10 seconds to enjoy them warm and soft.
- Freeze baked cookies in a freezer-safe container for up to 3 months; thaw at room temperature before serving.
- The dough can be prepared 2-3 days ahead and refrigerated or frozen for up to 3 months.
Nutrition
- Serving Size: 1 cookie
- Calories: 150 kcal
- Sugar: 12 g
- Sodium: 120 mg
- Fat: 7 g
- Saturated Fat: 4 g
- Unsaturated Fat: 3 g
- Trans Fat: 0 g
- Carbohydrates: 20 g
- Fiber: 0.5 g
- Protein: 2 g
- Cholesterol: 30 mg


Leave a Reply