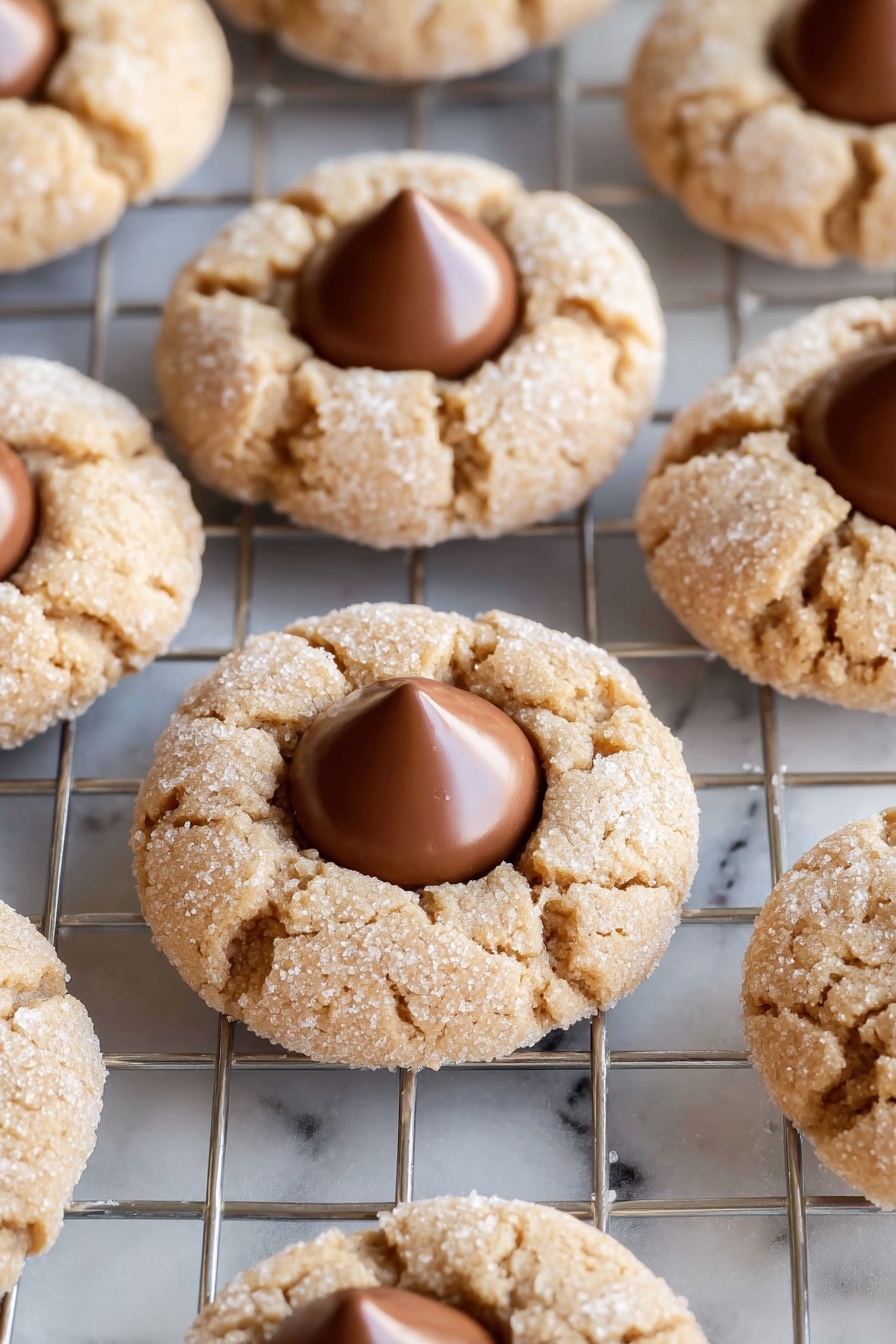
There’s something so nostalgic and comforting about a warm cookie topped with melty chocolate, and this Classic Peanut Butter Blossoms Recipe is exactly that kind of treat. Crunchy edges, soft centers, and that iconic chocolate kiss make every bite pure joy, perfect for sharing or sneaking straight from the cookie jar.

Jump to:
Why You'll Love This Recipe
This Classic Peanut Butter Blossoms Recipe has been a holiday favorite in my family for years — it’s quick to whip up, delivers that perfect peanut butter and chocolate combo, and always brings everyone to the kitchen for a taste. It’s one of those recipes that feels like a warm hug.
- Perfect Texture: Crispy on the outside, soft and chewy inside — peanut butter cookies done right.
- Simple Ingredients: Pantry staples you probably already have, making this an easy go-to anytime.
- Iconic Chocolate Kiss: That final touch puts these cookies on another level of deliciousness.
- Great for Gifting: Makes a beautiful, classic cookie jar gift or a showstopper at any party.
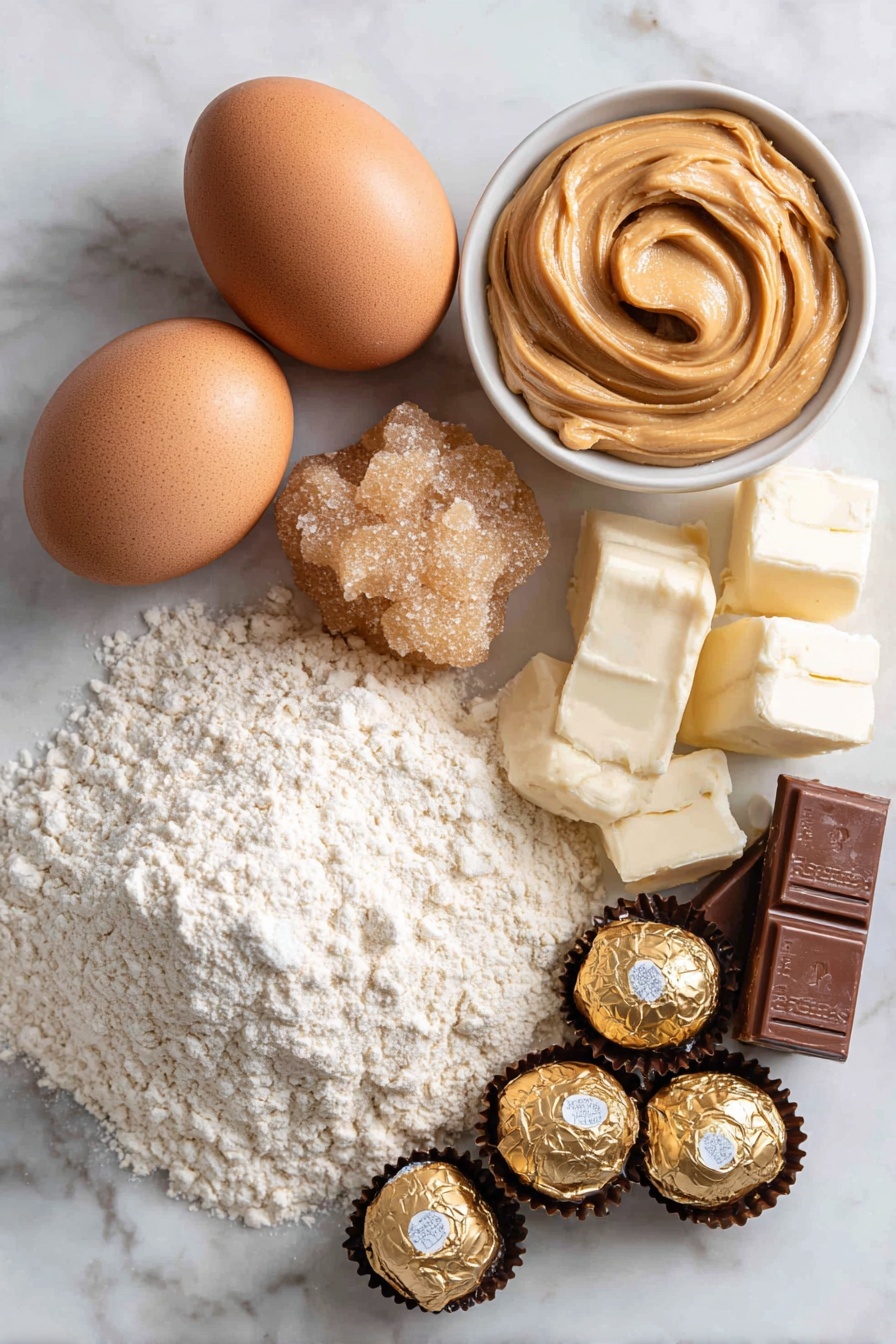
Ingredients & Why They Work
The magic in this Classic Peanut Butter Blossoms Recipe lies in the simple, well-balanced ingredients that come together to create something absolutely delicious. Each one plays a role in flavor or texture, and shopping for quality basics makes all the difference.
- Granulated Sugar: Adds sweetness and creates that signature crunchy sugar coating on the cookie exterior.
- Brown Sugar: Supports moisture and gives a slight caramel depth that blends beautifully with peanut butter.
- Creamy Peanut Butter: The star ingredient! Smooth peanut butter melts into the dough for a rich, tender bite.
- Unsalted Butter: Gives structure to the cookie while keeping it soft and buttery—make sure it’s softened to room temp for easy mixing.
- Egg: Binds the dough and helps with rise and texture.
- All-Purpose Flour: The base of the dough that balances moisture with structure.
- Baking Soda & Baking Powder: Work together to give the cookies a slight lift and the perfect crumb.
- Salt: Enhances all the flavors, especially the peanut butter and chocolate.
- Chocolate Candy Kisses: The iconic finishing touch that melts just the right amount on top, creating an irresistible center.
Make It Your Way
One of the joys of baking classic favorites like this is how easy it is to add your own twist. I like to switch up the type of chocolate kisses or even add a sprinkle of sea salt on top for an unexpected flavor pop. Feel free to make these your own—you can’t go wrong!
- Chocolate Variety: I've swapped out the classic milk chocolate kisses for dark chocolate or even peanut butter-filled kisses. Each brings a new depth that kids and adults both love.
- Nut Butter Alternative: If peanut butter isn’t your thing, creamy almond butter works surprisingly well, altering the flavor but keeping the texture just right.
- Flour Swap: For a gluten-free twist, try a 1:1 gluten-free baking flour blend; the cookies come out just as tender.
- Spice It Up: Adding a pinch of cinnamon or a splash of vanilla extract can elevate the flavor profile without changing the cookie’s heart.
Step-by-Step: How I Make Classic Peanut Butter Blossoms Recipe
Step 1: Mix the Sugars, Butter, Peanut Butter & Egg
Start by preheating your oven to 375°F — it’s important to have it ready so you can bake the cookies as soon as the dough is mixed. In a large bowl, use an electric mixer to blend together the ½ cup granulated sugar, ½ cup packed brown sugar, creamy peanut butter, softened butter, and one large egg until everything is smooth and creamy. This usually takes 2-3 minutes on medium speed. Don’t rush this step because it builds the base of your cookie’s flavor and texture.
Step 2: Add Dry Ingredients Gently
Switch the mixer to low and gradually add 1½ cups all-purpose flour, 1 teaspoon baking soda, ½ teaspoon baking powder, and ¼ teaspoon salt to the wet mixture. Mix just until combined—overmixing can make your cookies tough instead of tender. The dough should be soft but easy to shape into balls.
Step 3: Shape, Sugar Coat & Bake
Roll the dough into 1-inch balls and then roll each ball in granulated sugar for that beautiful textured coating. Place them 2 inches apart on an ungreased baking sheet. I find baking only one sheet at a time helps them bake more evenly. Bake for 8-10 minutes until the cookie edges just begin to turn a light golden brown.
Step 4: Add the Chocolate Kiss
The moment you take the cookies out of the oven, gently press one chocolate candy kiss in the center of each cookie while they’re still warm. This makes the chocolate soften perfectly without melting into an unidentifiable blob. Then, transfer cookies to a wire rack and let cool for about an hour to let the chocolate set.
Top Tip
Cooking these Classic Peanut Butter Blossoms has taught me a couple of little things that make a big difference — those small tweaks truly help nail the perfect texture and presentation.
- Room Temperature Ingredients: Always bring your butter and egg to room temperature; it helps form a smooth batter and ensures even baking.
- Don’t Overbake: They look slightly underdone when you pull them out, but they finish baking on the tray. This keeps them soft, so watch the edges carefully.
- Press Chocolate Kisses Warm: Adding the chocolate immediately after baking prevents cracking and melting; this step is key to that signature look.
- Use Parchment Paper or Silicone Mats: Even though the recipe says ungreased sheets, I always line mine with parchment or mats to avoid sticking and make cleanup a breeze.
How to Serve Classic Peanut Butter Blossoms Recipe
Garnishes
I usually keep it simple and let the chocolate kisses shine, but sometimes I dust a light sprinkle of flaky sea salt over the chocolate just before serving—it enhances the sweetness beautifully and gives a grown-up twist to these classic treats.
Side Dishes
These cookies pair wonderfully with a cold glass of milk or hot cocoa, especially when you're cozying up for a movie night. If you’re serving at a party, I like placing them alongside bowls of mixed nuts or fresh fruit for a little contrast between sweet and savory.
Creative Ways to Present
For birthdays or holidays, I’ve arranged these cookies on a tiered dessert stand with colorful napkins underneath for a festive touch. Another fun idea is to gently wrap small stacks in cellophane tied with twine for homemade gifts that look as good as they taste.
Make Ahead and Storage
Storing Leftovers
I store leftovers in an airtight container at room temperature, and they stay soft and fresh for about a week. I usually separate layers with parchment paper to keep them from sticking together because the chocolate kisses can sometimes create a little bit of a mess.
Freezing
These cookies freeze really well. I like to freeze the dough balls on a tray first, then transfer them to a freezer bag so I can bake fresh batches on demand. Fully baked cookies also freeze nicely—just thaw at room temperature for a soft, just-baked experience.
Reheating
To warm up leftover cookies, I pop them in the microwave for 10-15 seconds or in a low oven (about 300°F) for 5 minutes, which revives that freshly baked softness while keeping the chocolate kiss melty but not melted away.
Frequently Asked Questions:
You can! But creamy peanut butter gives the softest, most tender cookie. Crunchy peanut butter will add texture but may make the dough a bit harder to shape, so keep that in mind when forming balls.
Pressing the kisses into warm cookies right out of the oven prevents cracking by softening the cookie surface. If the cookie cools too much before adding the chocolate, it'll be more likely to crack.
With some ingredient swaps, yes! Use vegan butter alternatives, a flax egg instead of a chicken egg, and dairy-free chocolate kisses. The texture might shift a bit, but these adjustments can produce delicious vegan peanut butter blossoms.
Make sure your butter is softened but not melted, and chill the dough briefly if it's too sticky. Also, rolling the dough into 1-inch balls and spacing them well helps keep their shape. Avoid overmixing the dough once the flour is added.
Final Thoughts
Whenever I bake this Classic Peanut Butter Blossoms Recipe, it takes me back to cozy afternoons in my grandmother’s kitchen. They’re the kind of cookies that bring people together with their simple, familiar flavors and delightful texture. I hope you give this recipe a try and make some sweet memories of your own with these timeless treats!
Print
Classic Peanut Butter Blossoms Recipe
- Prep Time: 15 minutes
- Cook Time: 10 minutes
- Total Time: 25 minutes
- Yield: 24 cookies
- Category: Dessert
- Method: Baking
- Cuisine: American
Description
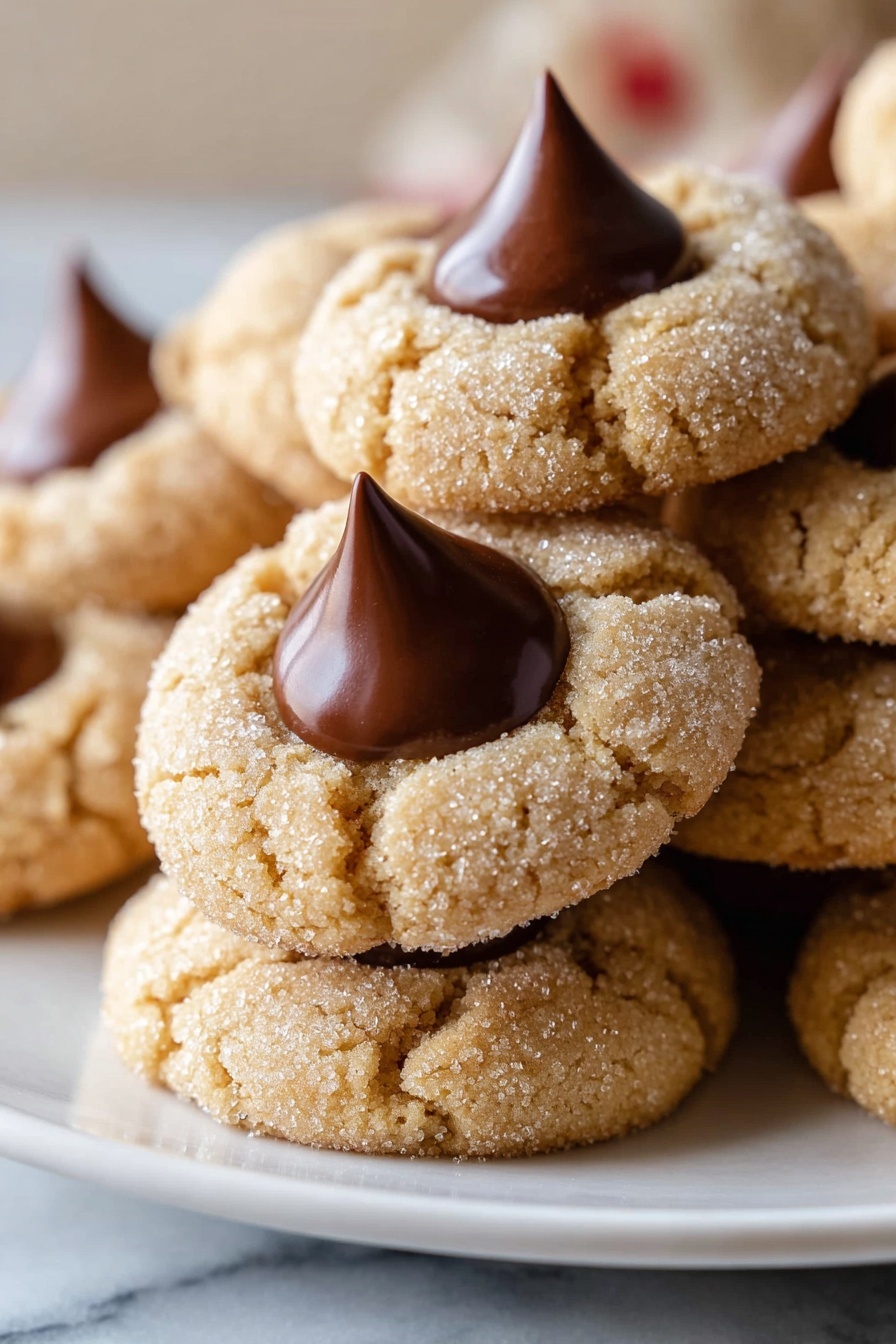
Classic Peanut Butter Blossoms are soft, chewy peanut butter cookies topped with a gooey chocolate kiss at the center. These delightful cookies combine the rich taste of peanut butter with the sweet surprise of chocolate candies, perfect for holidays, parties, or any time you crave a nostalgic treat.
Ingredients
Cookie Dough
- ½ cup granulated sugar, plus extra for dusting
- ½ cup brown sugar, packed
- ½ cup creamy peanut butter
- ½ cup unsalted butter, softened
- 1 large egg, at room temperature
- 1 ½ cups all-purpose flour
- 1 teaspoon baking soda
- ½ teaspoon baking powder
- ¼ teaspoon salt
Topping
- 24 chocolate candy kisses, such as Hershey's
Instructions
- Preheat Oven: Preheat your oven to 375 degrees Fahrenheit to ensure it is hot and ready for baking the cookies evenly.
- Mix Wet Ingredients: In a large bowl, use an electric mixer on medium speed to blend together the brown sugar, granulated sugar, creamy peanut butter, softened unsalted butter, and the egg until the mixture is smooth and well combined.
- Add Dry Ingredients: Lower the mixer speed to low and gradually add the all-purpose flour, baking soda, baking powder, and salt. Mix until just combined to form the cookie dough.
- Form Cookie Balls: Shape the dough into 1-inch diameter balls. Roll each ball thoroughly in granulated sugar to coat the surface evenly.
- Arrange on Baking Sheet: Place the sugared dough balls on an ungreased baking sheet, spacing them approximately 2 inches apart to allow for spreading during baking.
- Bake Cookies: Bake the cookies one sheet at a time for 10 minutes or until the edges turn a light golden brown. Baking one sheet at a time ensures even cooking.
- Add Chocolate Kisses: Immediately after removing a baking sheet from the oven, press one chocolate candy kiss into the center of each hot cookie, slightly pushing it in without breaking the cookie.
- Cool Cookies: Transfer the cookies carefully to a wire rack to cool completely. Let them sit for about 1 hour to allow the chocolate to set firmly before serving.
Notes
- Make sure the egg is at room temperature to help ingredients blend smoothly.
- If the dough feels too sticky, chill it in the refrigerator for 30 minutes before shaping.
- Use an ungreased baking sheet to ensure cookies hold their shape and texture properly.
- You can substitute chocolate candy kisses with other small chocolates if preferred.
- Store the cookies in an airtight container at room temperature for up to a week to maintain freshness.
Nutrition
- Serving Size: 1 cookie
- Calories: 110 kcal
- Sugar: 8 g
- Sodium: 90 mg
- Fat: 6 g
- Saturated Fat: 2 g
- Unsaturated Fat: 3 g
- Trans Fat: 0 g
- Carbohydrates: 12 g
- Fiber: 1 g
- Protein: 2 g
- Cholesterol: 15 mg


Leave a Reply