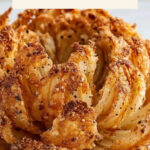
If you're craving a snack that's both crunchy and bursting with flavor, you're going to want to try this Crispy Blooming Onion Recipe. Imagine a massive sweet onion, sliced to perfection into petal-like sections, seasoned just right, and fried until golden and irresistibly crisp.

Jump to:
Why You'll Love This Recipe
I remember first making this blooming onion for a weekend gathering, and it stole the spotlight immediately! It's a showstopper that’s so much fun to make and even better to eat, especially because it’s crispy on the outside but tender inside—total comfort food vibes.
- Super impressive presentation: It looks like a fancy appetizer but is surprisingly easy to make at home.
- Perfect balance of textures: Crispy coating with soft, sweet onion petals inside that melt in your mouth.
- Flavorful seasoning blend: A mix of spices brings just the right kick without overpowering the onion’s natural sweetness.
- Customizable dipping sauce: Serve with your favorite sauce to match your mood or party theme.
Ingredients & Why They Work
Before you start, make sure to grab a large sweet onion like a Vidalia—it’s naturally sweet and perfect for frying. Using high-heat oil ensures a crisp fry without burning, and our spice mixture packs just the right punch to keep things exciting.
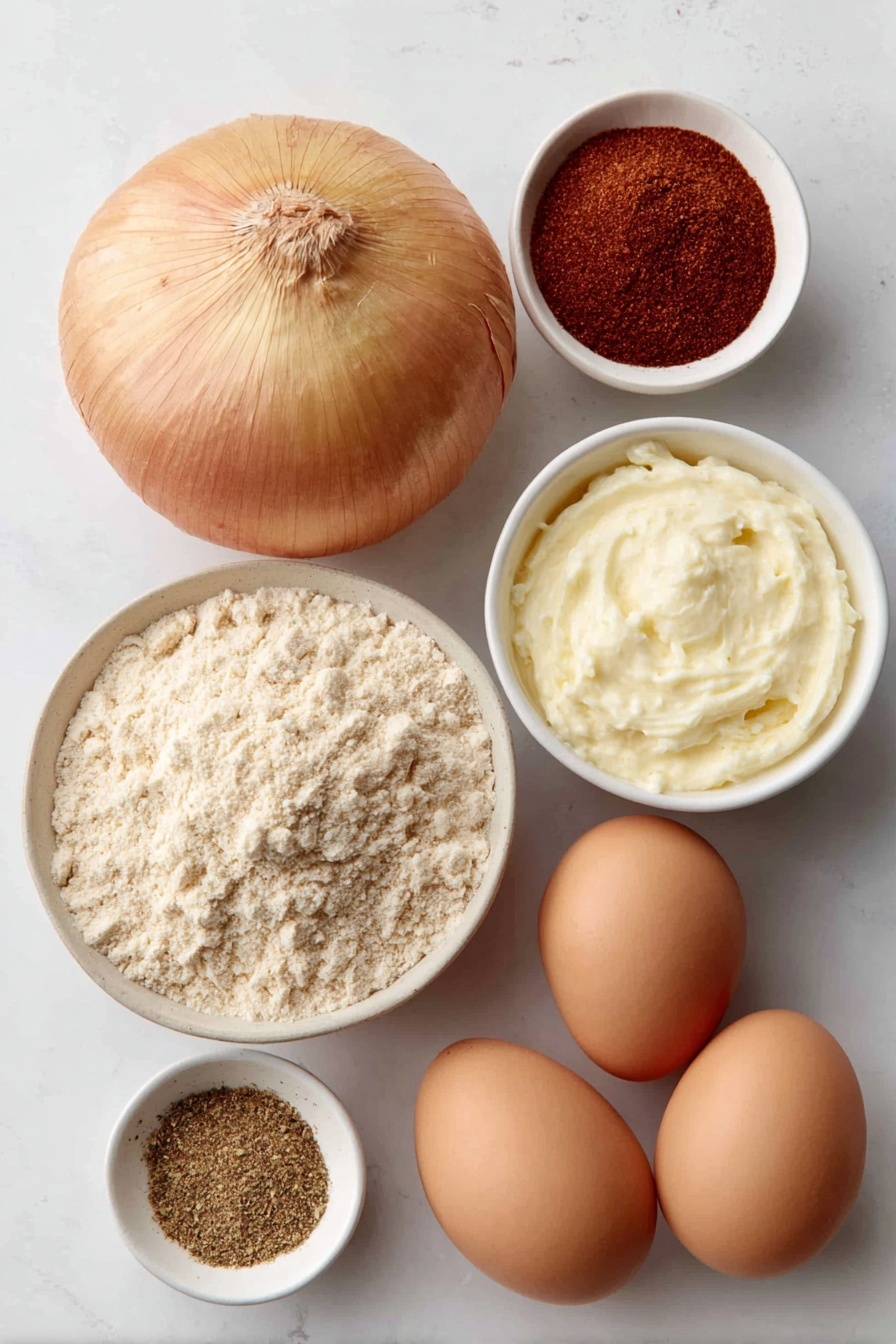
- High-heat oil: Essential for deep frying because it withstands high temperatures without smoking or breaking down.
- Large sweet onion: Vidalia or similar type; sweet onions hold up well to frying and have less pungency.
- All-purpose flour: Forms the crispy, seasoned crust on the onion petals for that satisfying crunch.
- Paprika: Adds smokiness and vibrant color to the breading.
- Kosher salt: Enhances flavor and seasons each layer properly.
- Dried oregano: Brings a subtle herbaceous note that complements the onion.
- Cayenne pepper: Provides a gentle heat kick to keep things interesting.
- Ground cumin: Adds earthiness and depth to the flavor profile.
- Garlic powder: For that classic savory undertone that pairs perfectly with fried foods.
- Freshly ground black pepper: Adds a mild spice and freshness to the crust.
- Large eggs: Help bind the flour mixture to the onion and create a perfect coating.
- Buttermilk (or milk): Adds moisture and tenderness, helping the breading adhere better.
- Dipping sauce (optional): A delicious sidekick like ranch, spicy mayo, or horseradish sauce amplifies every bite.
Make It Your Way
The beauty of this Crispy Blooming Onion Recipe is that it’s a fantastic canvas for your creativity. Whether you're looking to play with spices or cater to dietary preferences, there are plenty of fun variations to suit your taste buds.
- Spice it up: I love adding a little extra cayenne pepper or smoked paprika to the flour mix for a smoky, spicy twist that wakes up your palate. It really turns up the heat and depth of flavor!
- Herb-forward: Try swapping the dried oregano for fresh herbs like thyme or rosemary for a fresh, aromatic touch. It gives the onion a bright, garden-fresh character that pairs beautifully with a mild dipping sauce.
- Gluten-free option: You can replace the all-purpose flour with a gluten-free flour blend. Just be sure it’s suitable for frying to keep that same light, crispy texture.
- Dipping sauce swaps: While a classic ranch or horseradish sauce is great, I also enjoy a creamy chipotle mayo or tangy blue cheese dip to mix things up — it’s all about what makes your taste buds happy.
Step-by-Step: How I Make Crispy Blooming Onion Recipe
Step 1: Heating the Oil Just Right
Start by pouring 4 quarts of your chosen high-heat oil—like canola, corn, or peanut—into a large stockpot. Make sure there’s plenty of space above the oil to prevent any bubbling over. Heat it over medium-high heat until it reaches 375ºF. This precise temperature is key for that perfect golden crunch.
Step 2: Mixing the Flavorful Dry Coating
While the oil heats up, whisk together 1 cup all-purpose flour, 1 tablespoon paprika, 2½ teaspoons kosher salt, ¾ teaspoon cayenne pepper, 1 teaspoon dried oregano, ¾ teaspoon cumin, ¾ teaspoon garlic powder, and ½ teaspoon freshly ground black pepper in a large bowl. Then, scoop out about ¾ cup of this seasoned flour and set it aside—you’ll need it later for that second coat of crispiness.
Step 3: Whipping Up the Wet Mixture
In a medium bowl, whisk 2 large eggs with ½ cup buttermilk (or whole/2% milk) and the remaining ¼ teaspoon kosher salt until smooth and combined. This mixture helps all those delicious seasonings cling beautifully to the onion.
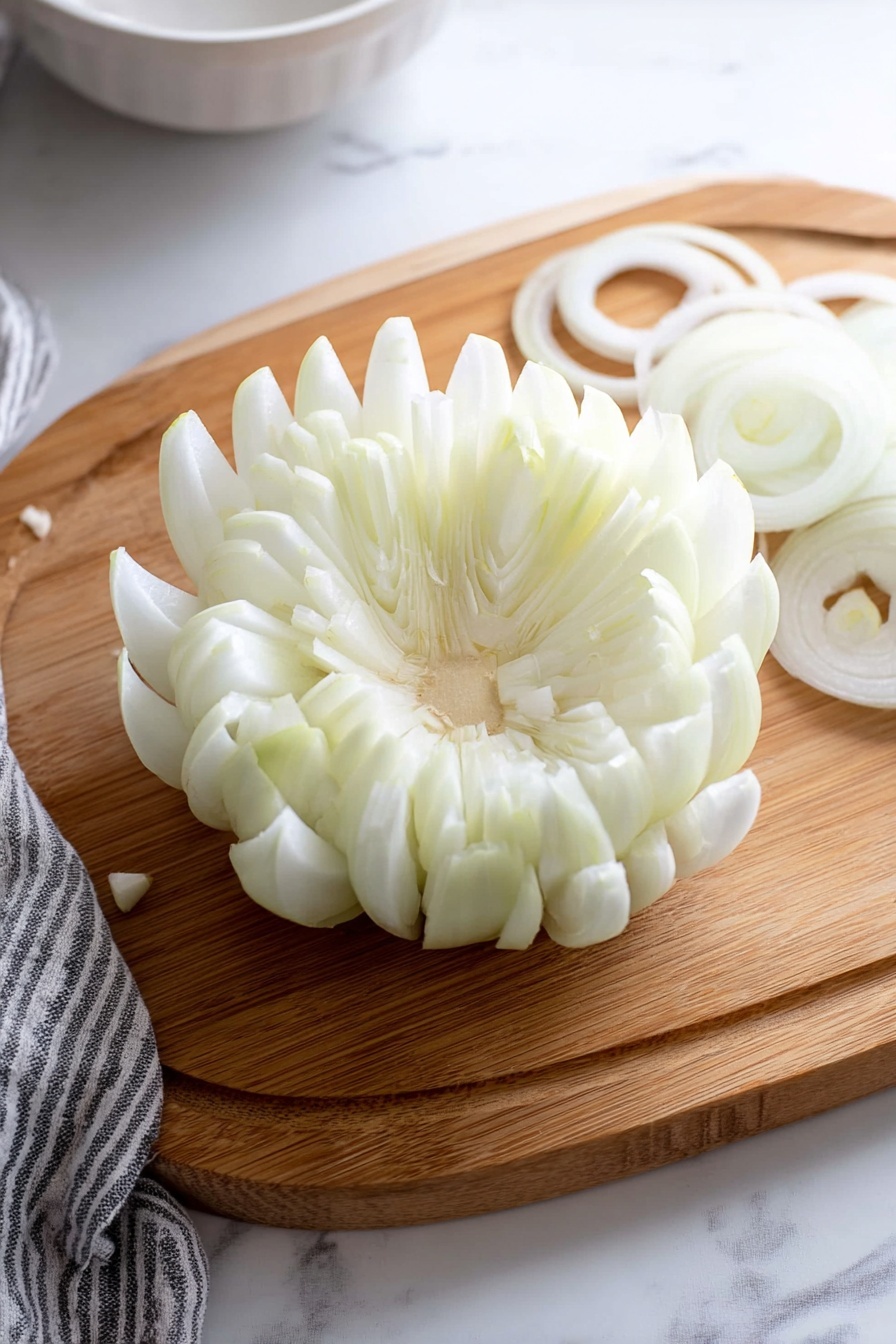
Step 4: Cutting the Onion into Petals
Grab a large sweet onion (13 to 14 ounces works best). Trim ½ to ¾ inch off the stem end (the end opposite the root) and peel away the outer skin. Place the onion root-side up on a cutting board. With a very sharp chef’s knife, start making four straight cuts from approximately ½ inch below the root down toward the board while rotating the onion a quarter turn between cuts. This creates 4 sections.
Next, add 4 more cuts between the first to create 8 sections, and then 8 additional cuts to reach 16 petals. The root end must remain intact to hold everything together when frying. Flip the onion over and gently spread the petals open like a blooming flower. If some pieces stick together near the center, run the knife tip between them carefully to separate.
Step 5: First Flour Coat to Lock in Seasoning
Set the onion cut side up in your large bowl with the seasoned flour mixture. Sprinkle the reserved ¾ cup flour over the petals, spreading them carefully so the flour reaches all the nooks and crannies. Shake off any excess flour so the coating isn’t clumpy.
Step 6: Dipping Into the Egg Mixture
Now, turn the onion cut side down and lower it gently into the egg and buttermilk mixture. Use a scooping motion to lift and spread the petals, making sure every petal gets nicely coated. Let any excess liquid drip back into the bowl to avoid sogginess when frying.
Step 7: The Final Flour Coat for Ultimate Crispiness
Transfer the onion back cut side up into the flour mixture. Gently spread the petals and sprinkle more reserved flour over each section, ensuring every surface is well coated. This double coating is the secret behind that crave-worthy crispy crust.
Step 8: Frying to Golden Perfection
Line a baking sheet with a wire rack and paper towels to drain excess oil after frying. When your oil is hot at 375ºF, carefully place the coated onion cut side up into the pot—be mindful of bubbling oil! The temperature will drop slightly; keep it steady between 360ºF and 365ºF. Fry for about 4 minutes until the bottom turns a deep golden brown.
Then, gently flip the blooming onion and fry for another 3 to 4 minutes until it’s tender when pierced with a knife and beautifully golden all over.
Step 9: Draining and Final Seasoning
Using a spider or slotted spoon, lift the onion cut side down to let excess oil drain back into the pot. Place it cut side up on the prepared wire rack and sprinkle with the remaining ¼ teaspoon kosher salt while it’s still hot. Let it rest about 5 minutes so it crisps up even more before serving.
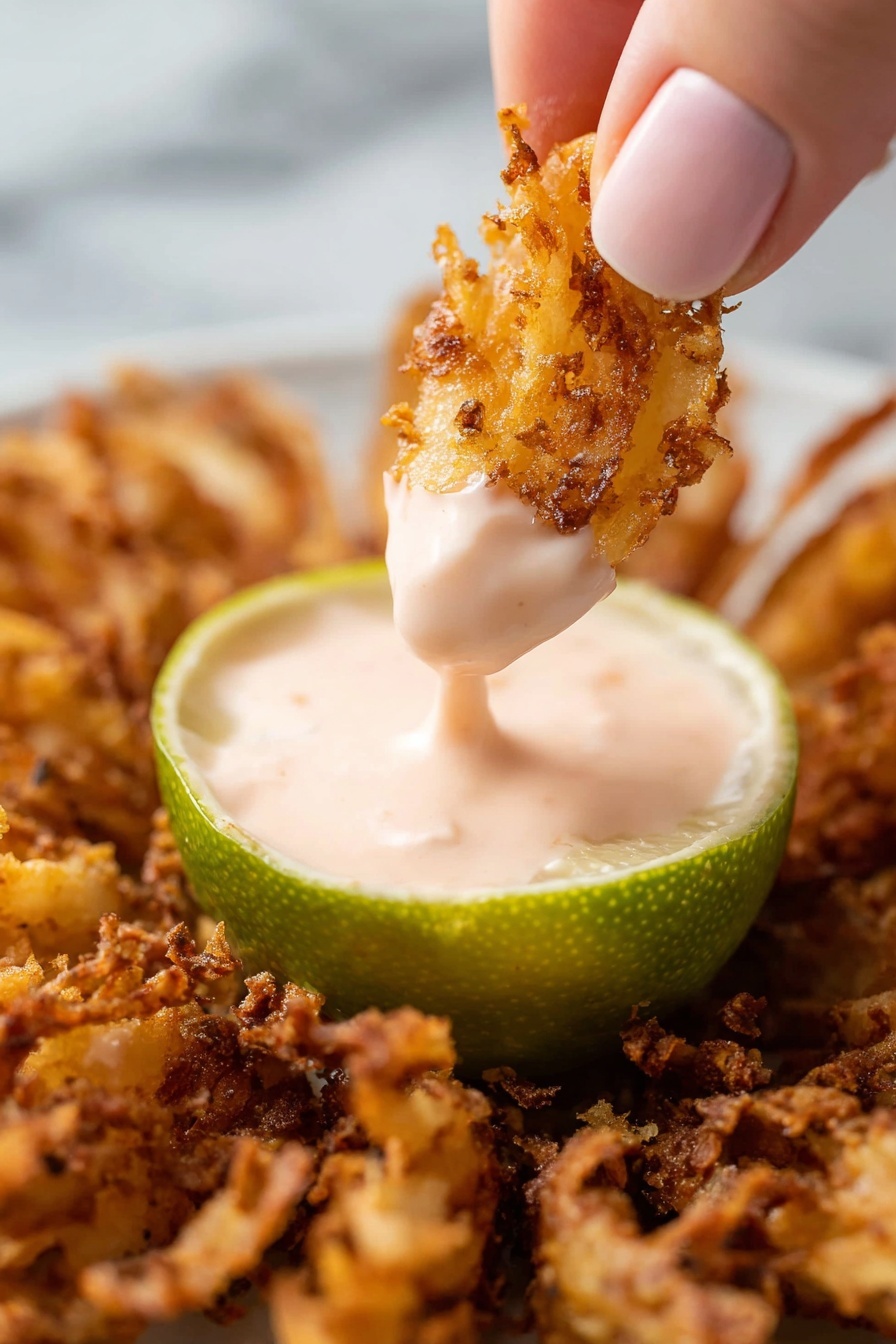
Step 10: Serve and Enjoy!
Serve your crispy blooming onion with your favorite dipping sauce and watch it disappear in no time — it’s the perfect appetizer to impress friends or indulge in a delicious treat all by yourself!
Top Tip
Making a perfect crispy blooming onion isn’t just about following the recipe—it’s about the little details that bring it all together. These tips will help you get that golden crunch and tender inside every single time.
- Sharp Knife: I’ve found using a very sharp chef’s knife to cut the onion is a game changer—it helps create clean petals without tearing, which keeps the onion intact during frying.
- Oil Temperature Control: Maintaining the oil between 360ºF and 375ºF ensures that your onion cooks evenly and stays crispy instead of soggy or greasy. A good thermometer is your best friend here.
- Flour Coating Technique: Sprinkling the reserved flour mixture over the petals section by section really helped me get an even, thorough coating. It’s what gives the onion that irresistible crispy crust.
- Don’t Skip the Root: Keeping the root intact while cutting is crucial—I learned this the hard way when my onion petals fell apart during frying!
How to Serve Crispy Blooming Onion Recipe
Garnishes
Garnishes add personality and extra flavor to your crispy blooming onion. Try fresh chopped parsley or chives sprinkled on top for a pop of color and fresh aroma. A light dash of smoked paprika or a squeeze of fresh lemon juice can also brighten up the dish beautifully.
Side Dishes
This blooming onion pairs wonderfully with classic sides like crispy French fries or a fresh green salad with a tangy vinaigrette to balance the richness. For something heartier, serve alongside coleslaw or creamy mashed potatoes to create a satisfying, crowd-pleasing meal.
Make Ahead and Storage
Storing Leftovers
If you happen to have any leftovers of this delicious crispy blooming onion, store them in an airtight container in the refrigerator for up to 2 days. To keep the petals from getting soggy, place a paper towel in the container to absorb excess moisture.
Freezing
Freezing is not ideal for this recipe because the delicate crispy coating can become soggy upon thawing. However, if you must freeze, cool the onion completely, wrap it tightly in plastic wrap and foil, and freeze for up to 1 month. Thaw in the refrigerator before reheating.
Reheating
To bring back the crunch, reheat the blooming onion in a preheated oven at 375ºF for about 8-10 minutes on a wire rack placed over a baking sheet. This helps the heat circulate and keeps the coating crisp—avoid the microwave as it makes the onion soggy.
Frequently Asked Questions:
You can, but large sweet onions like Vidalia work best for this recipe because they have mild flavor and the right size to create those beautiful petals. Other onions may be sharper in taste or too small to produce the iconic blossom effect.
High-heat oils such as canola, corn, or peanut oil are ideal for deep-frying because they have a neutral flavor and a high smoke point. This helps you fry at 375ºF without burning the oil or the onion.
The root acts like the center anchor holding the petals together. If you cut through the root, the onion will fall apart during frying, making it difficult to flip and serve.
Absolutely! Just substitute the all-purpose flour with a gluten-free flour blend that works for frying. Make sure it’s finely ground for the best coating texture.
Final Thoughts
There’s something truly special about a Crispy Blooming Onion—it’s both a visual showstopper and a deliciously savory snack that brings smiles around the table. With a little care and attention to detail, you’ll master this recipe and impress your friends and family. So go ahead, gather your ingredients, fire up the oil, and enjoy every crunchy, flavorful bite!
Print
Crispy Blooming Onion Recipe
- Prep Time: 20 minutes
- Cook Time: 8 minutes
- Total Time: 28 minutes
- Yield: 4 servings
- Category: Appetizer
- Method: Frying
- Cuisine: American
Description
This blooming onion recipe features a large sweet onion cut into a flower-like shape, coated in a flavorful seasoned flour and egg mixture, then deep-fried to golden perfection. Crisp on the outside and tender inside, it's an impressive appetizer or snack often served with a dipping sauce.
Ingredients
Oil for Frying
- 4 quarts high-heat oil (canola, corn, or peanut)
Onion and Breading
- 1 large sweet onion (13 to 14 ounces), such as Vidalia
- 1 cup all-purpose flour
- 1 tablespoon paprika
- 3 teaspoons kosher salt, divided
- 1 teaspoon dried oregano
- ¾ teaspoon cayenne pepper
- ¾ teaspoon ground cumin
- ¾ teaspoon garlic powder
- ½ teaspoon freshly ground black pepper
Wet Mixture
- 2 large eggs
- ½ cup buttermilk (whole or 2% milk can be used)
Optional
- Dipping sauce of choice
Instructions
- Heat the oil: Pour 4 quarts of your chosen high-heat oil into a large stockpot, ensuring plenty of room above the oil to prevent overflow. Heat over medium-high until the temperature reaches 375ºF.
- Prepare the dry mixture: In a large bowl, whisk together 1 cup all-purpose flour, 1 tablespoon paprika, 2 ½ teaspoons kosher salt, ¾ teaspoon cayenne pepper, 1 teaspoon dried oregano, ¾ teaspoon ground cumin, ¾ teaspoon garlic powder, and ½ teaspoon black pepper. Remove about ¾ cup of this mixture and set it aside for later use.
- Mix the wet ingredients: In a medium bowl, whisk together 2 large eggs, ½ cup buttermilk (or milk), and the remaining ¼ teaspoon kosher salt until well combined.
- Prepare the onion: Using a sharp chef’s knife, trim ½ to ¾ inch off the stem end of the onion and peel off its outer skin. Place the onion root-side up on a cutting board.
- Cut the onion petals: Starting about ½ inch below the root, make 4 cuts straight down towards the cutting board, spacing them evenly as you rotate the onion quarter turns between cuts. This creates 4 sections.
- Create additional petals: Make 4 more cuts between the initial cuts to form 8 sections. Then, make 8 more cuts between these to reach 16 sections while keeping the root intact to hold the onion together.
- Open the onion flower: Flip the onion over and carefully spread the cuts to open it like a blooming flower. Use the tip of the knife to separate any stuck pieces near the center to ensure even cooking.
- Coat in flour mixture: Place the onion cut-side up into the bowl with the flour mixture. Sprinkle the reserved flour over the petals, spreading them to get flour into all nooks. Gently shake off any excess flour.
- Dip in egg mixture: Transfer the onion cut side down into the egg mixture. Using a scooping motion, lift and spread the petals to coat thoroughly. Let excess liquid drip back into the bowl.
- Second coat of flour: Move the onion back to the flour mixture cut side up. Spread the petals and sprinkle reserved flour over it section by section to coat all surfaces well.
- Prepare for frying: Line a baking sheet with a wire rack topped with a paper towel to drain the oil after frying.
- Fry the onion: When the oil reaches 375ºF, gently place the coated onion cut side up into the hot oil. The temperature will drop; maintain it between 360ºF and 365ºF. Fry for about 4 minutes until the bottom is deep golden brown.
- Flip and finish frying: Carefully flip the onion and fry for an additional 3 to 4 minutes until the onion is knife tender and evenly golden brown.
- Drain and season: Remove the blooming onion with a spider or slotted spoon, holding cut side down to let excess oil drain back into the pot. Place it cut side up on the prepared rack and sprinkle with the remaining ¼ teaspoon kosher salt.
- Rest and serve: Let the blooming onion cool for about 5 minutes before serving with your choice of dipping sauce.
Notes
- Use a very sharp knife to make clean cuts without ripping the onion petals.
- Maintain the oil temperature between 360ºF and 375ºF for even frying and crispy texture.
- Buttermilk can be substituted with whole milk or 2% milk if desired.
- Try different dipping sauces such as spicy mayo, ranch, or horseradish sauce to complement the blooming onion.
- Ensure the root stays intact during cutting to hold the onion together while frying.
- Drain the fried onion well on a wire rack to keep it crispy instead of soggy.
Nutrition
- Serving Size: 1 serving
- Calories: 450 kcal
- Sugar: 5 g
- Sodium: 1000 mg
- Fat: 30 g
- Saturated Fat: 5 g
- Unsaturated Fat: 22 g
- Trans Fat: 0 g
- Carbohydrates: 40 g
- Fiber: 3 g
- Protein: 6 g
- Cholesterol: 70 mg


Leave a Reply