Crispy Cheeseburger Spring Rolls Recipe combines the best of two worlds — that classic cheeseburger flavor you love wrapped up in a perfectly crispy spring roll shell. It’s a total game-changer when you want something fun and flavorful but still super easy to make at home.

Jump to:
Why You'll Love This Recipe
This Crispy Cheeseburger Spring Rolls Recipe quickly became one of my favorites because it’s like eating your favorite burger with a crispy twist that’s perfect for parties, weeknight dinners, or just impressing your family. I remember the first time I made these – the crunch, the cheesy goodness, and all the flavor packed inside totally won me over.
- Flavor Explosion: All the cheeseburger classics—savory beef, melted cheese, pickles, and tangy sauces—wrapped in a crunchy spring roll.
- Quick & Easy: Takes just about 35 minutes from start to finish, making it perfect for busy nights without sacrificing taste.
- Customizable: You can tweak the fillings or add your favorite condiments to match your family’s preferences.
- Party-Ready: These rolls are finger-friendly and super fun to dip, making them a hit at gatherings of any kind.
Ingredients & Why They Work
Each ingredient in this Crispy Cheeseburger Spring Rolls Recipe plays an important part in creating that familiar burger flavor while making sure the texture is crispy and satisfying. When shopping, choose fresh and quality ingredients, especially the ground beef and cheese—it really makes a difference.

- Ground Beef (80/20): The fat ratio keeps the meat juicy and flavorful, preventing dry filling inside the rolls.
- Onion: Finely diced to add a sweet and savory base flavor that caramelizes nicely with the beef.
- Ketchup: Gives that classic tangy sweetness reminiscent of a cheeseburger sauce.
- Yellow Mustard: Adds a sharp tang that cuts through the richness of the beef and cheese.
- Worcestershire Sauce: Deepens the overall umami flavor with its subtle complexity.
- Garlic Powder & Onion Powder: Intensify the savory notes without adding moisture.
- Kosher Salt & Black Pepper: Essential for seasoning to balance flavors.
- Shredded Cheddar or American Cheese: Melts beautifully and mimics the ooey-gooey cheeseburger vibe.
- Dill Pickles: Provide crunch and tartness that complement the beef perfectly.
- Spring Roll Wrappers: These give you that unmistakable crispy shell once fried or air-fried.
- Flour & Water Paste: Acts like glue to perfectly seal your spring rolls so nothing leaks out during cooking.
- Oil for Frying: Use a neutral oil with a high smoke point like canola or vegetable oil for the best crispiness.
Make It Your Way
I love playing around with this recipe to suit different tastes or occasions—you can mix up the cheese, add spicy elements, or even try a low-carb version. The key is to keep the balance of flavors while making sure your filling isn’t too soggy for rolling.
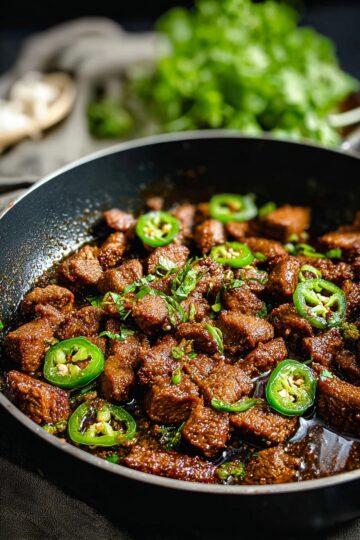
- Variation: Once, I added a bit of diced jalapeño to the beef mixture for a spicy kick—it was fantastic for movie night!
- Vegetarian Option: Swap ground beef for seasoned lentils or plant-based meat scraps for a veggie-friendly spin.
- Cheese Choices: Try smoked gouda or pepper jack for a flavor twist that still melts well.
- Cooking Methods: Air-frying reduces oil but still yields great crispiness if you want a lighter version.
Step-by-Step: How I Make Crispy Cheeseburger Spring Rolls Recipe
Step 1: Brown the Beef and Sauté the Onion
Start by heating your skillet over medium-high heat. Add the ground beef and diced onion and cook until the beef is nicely browned and the onions are soft with a few crispy bits on the edges (about 5–7 minutes). Don’t rush this step—those crispy bits add so much flavor. Once browned, carefully drain all the grease to avoid soggy filling later.
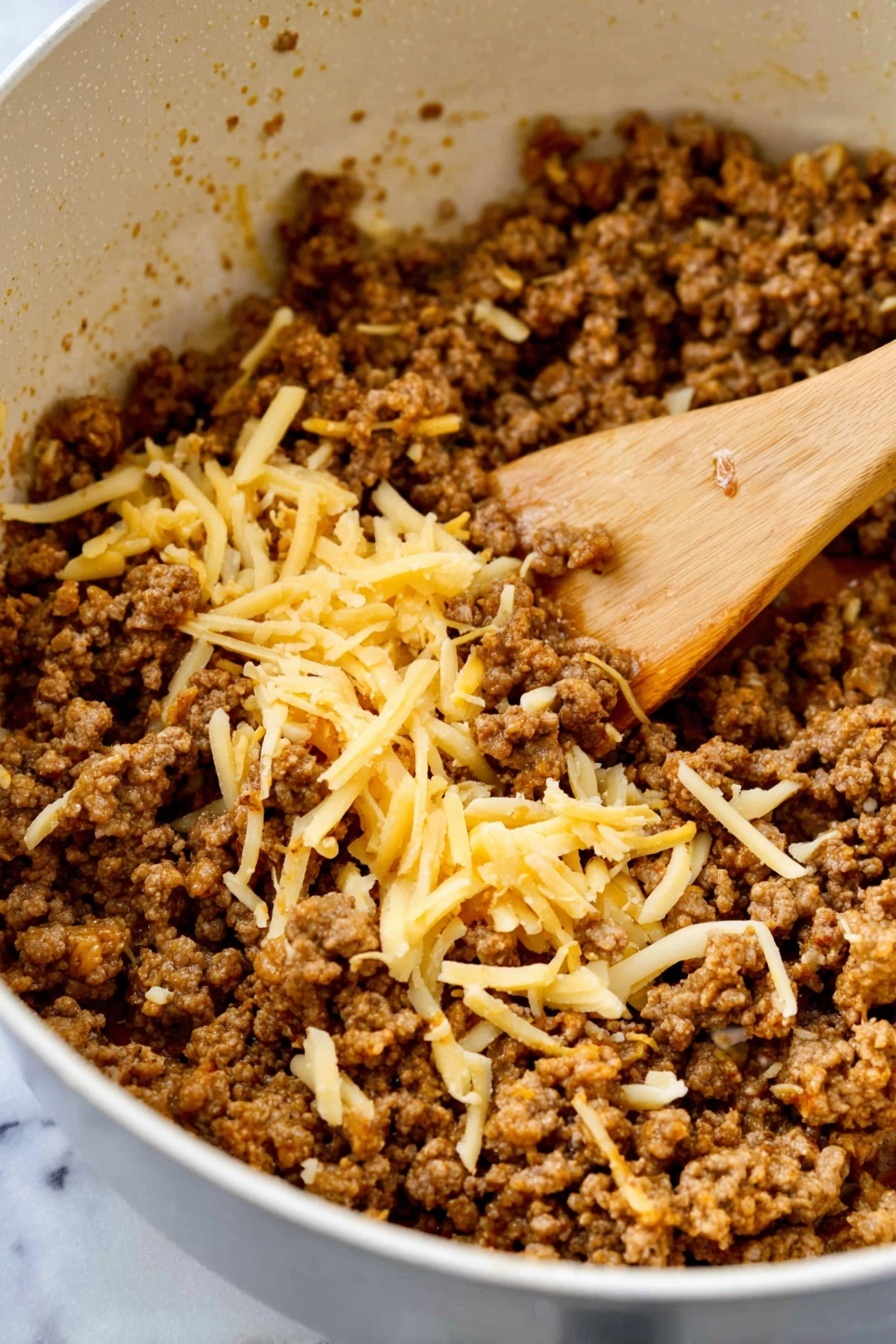
Step 2: Season and Cool the Filling
Stir in ketchup, mustard, Worcestershire sauce, garlic powder, onion powder, salt, and pepper. Mix until everything is combined, then transfer the mixture to a bowl to cool for about 5 minutes—this keeps your cheese from melting too soon. After cooling, fold in the shredded cheese and chopped pickles gently so they stay chunky and flavorful.
Step 3: Roll ’Em Up
Keep your spring roll wrappers covered with a damp kitchen towel while you work to prevent them from drying out. Spoon about 2 tablespoons of filling in the center of each wrapper. Fold the sides in, roll tightly like a burrito, then seal the edges with a simple flour-water paste. Avoid overfilling so the rolls don’t burst during frying.
Step 4: Crisp ’Em Up
Heat about 2 inches of oil in a deep pot to 350°F. Fry 3-4 rolls at a time, turning occasionally, until golden and crispy, around 3-4 minutes. Drain on paper towels. Alternatively, for a lighter option, spritz the rolls with oil and air-fry at 390°F for 10-12 minutes, flipping halfway until crispy on all sides.
Step 5: Serve with Your Favorite Dips
Serve these hot with a mix of ketchup and mayo or sweet chili sauce with sour cream for dipping. They’re so addictive that you might want to double the recipe!
Top Tip
I’ve made these Crispy Cheeseburger Spring Rolls Recipe dozens of times now, and trust me, a few small tricks make all the difference between a soggy mess and perfectly crispy rolls every time.
- Drain the Beef Thoroughly: Removing every bit of grease prevents soggy rolls and keeps that filling rich but not greasy.
- Don’t Skip the Cooling Step: Letting the filling cool slightly before rolling helps the cheese stay intact during frying.
- Seal Properly: Use a good flour paste and press edges firmly to avoid any filling leaking out in the hot oil.
- Monitor Oil Temperature: Keep oil steady at 350°F to get golden, crispy rolls without burning or undercooking.
How to Serve Crispy Cheeseburger Spring Rolls Recipe

Garnishes
I like to sprinkle chopped fresh parsley or green onions on top for a pop of color and fresh flavor contrast. A little sprinkle of sesame seeds can add visual appeal and a mild nutty bite that’s surprisingly nice with these rolls.
Side Dishes
Pair your spring rolls with crispy fries or a simple side salad with a tangy vinaigrette to balance all the richness. For a casual gathering, I love serving with coleslaw or pickled veggies for some crunch and brightness.
Creative Ways to Present
For parties, I arrange the rolls standing upright in small glasses with dipping sauces layered at the bottom for easy grab-and-dip fun. Alternatively, place them on a platter lined with lettuce leaves paired with mini burger flags to play up the cheeseburger theme!
Make Ahead and Storage
Storing Leftovers
If you have leftovers (which can be rare!), store cooked spring rolls in an airtight container in the fridge. Reheat in the oven or air fryer to maintain crispness instead of using a microwave, which makes them soggy.
Freezing
I recommend freezing these unbaked. Place rolls on a parchment-lined tray in a single layer, freeze until solid, then transfer to a zip-top bag. You can fry or air-fry straight from frozen—just add a couple of extra minutes to the cooking time.
Reheating
For reheating, I pop them in my air fryer or oven at 375°F for 5-7 minutes until they’re warm and crispy again. Avoid the microwave unless you don’t mind losing that satisfying crunch.
Frequently Asked Questions:
Yes! While frying or air frying gives the crispiest results, you can bake them at 400°F for about 15-20 minutes, turning halfway through. Spray the rolls with oil beforehand for better browning.
Avoid overfilling the wrappers and seal the edges tightly with the flour paste. Also, frying at the correct temperature (350°F) ensures they cook quickly without exploding from trapped steam.
Absolutely! The filling can be made a day ahead and refrigerated. Just bring it back to room temperature before rolling for easier handling and best results.
Classic mixtures like ketchup and mayonnaise or sweet chili sauce with a dollop of sour cream complement the cheeseburger flavors perfectly. Feel free to experiment with spicy aioli or ranch dressing too!
Final Thoughts
I honestly can’t recommend this Crispy Cheeseburger Spring Rolls Recipe enough—it’s become my go-to when I want to impress without spending hours cooking. The way it combines familiar flavors with that satisfying crunch is just incredibly comforting. Give these a try the next time you need a crowd-pleaser or a fun dinner twist and I’m sure you’ll love how easy and delicious they are!
Print
Delicious Recipe
- Prep Time: 20 minutes
- Cook Time: 15 minutes
- Total Time: 35 minutes
- Yield: 12 rolls
- Category: Appetizer
- Method: Frying
- Cuisine: American
Description
Cheeseburger Spring Rolls combine the classic flavors of a cheeseburger with the crispy, golden texture of spring rolls. Ground beef seasoned with ketchup, mustard, and Worcestershire sauce is mixed with cheddar cheese and pickles, wrapped in spring roll wrappers, and fried to perfection. Serve these crispy treats with tangy dipping sauces for a fun and flavorful appetizer or snack.
Ingredients
Filling
- 1 pound ground beef (80/20 for best flavor)
- 1 small onion, finely diced
- 2 tablespoons ketchup
- 1 tablespoon yellow mustard
- 1 teaspoon Worcestershire sauce
- 1 teaspoon garlic powder
- 1 teaspoon onion powder
- Kosher salt, to taste
- Freshly cracked black pepper, to taste
- 1 cup shredded cheddar or American cheese
- ¼ cup finely chopped dill pickles
Spring Rolls and Sealing
- 12 spring roll wrappers (thawed if frozen)
- 2 tablespoons flour
- 3 tablespoons water
For Frying and Serving
- Oil for frying
- Mix of ketchup and mayonnaise or sweet chili sauce and sour cream for dipping
Instructions
- Cook the Filling: Heat a skillet over medium-high heat. Add ground beef and diced onion, cooking until browned with crispy edges, about 5 to 7 minutes. Drain all excess grease from the skillet.
- Season the Meat: Stir in ketchup, yellow mustard, Worcestershire sauce, garlic powder, onion powder, salt, and freshly cracked black pepper. Cook and mix well, then let the filling cool for 5 minutes.
- Mix Cheese and Pickles: Once cooled slightly, fold in the shredded cheddar or American cheese and finely chopped dill pickles evenly throughout the mixture.
- Prepare the Wrappers: Keep the spring roll wrappers covered with a damp towel to prevent drying. Prepare the sealing paste by mixing 2 tablespoons of flour with 3 tablespoons of water until smooth.
- Assemble Spring Rolls: Place 2 tablespoons of the prepared filling in the center of each wrapper. Fold in the sides and roll tightly like a burrito. Seal the edges using the flour paste. Avoid overfilling to prevent bursting during cooking.
- Heat Oil for Frying: Pour about 2 inches of oil into a deep pan and heat to 350°F (175°C). Carefully fry 3 to 4 rolls at a time for 3 to 4 minutes or until golden brown. Drain on paper towels to remove excess oil.
- Optional Air Frying Step: Alternatively, spritz the assembled rolls with oil and air-fry at 390°F (199°C) for 10 to 12 minutes, flipping halfway through for even crisping.
- Serve: Serve the spring rolls hot with dipping sauces such as a mix of ketchup and mayonnaise or sweet chili sauce with sour cream for added flavor.
- Freezing and Storing: To freeze, place uncooked rolls on a parchment-lined tray until solid, then transfer them to a zip-top bag. Cook from frozen by adding 1 to 2 extra minutes to the cooking time.
Notes
- Use 80/20 ground beef for optimal flavor and moisture balance.
- Ensure the spring roll wrappers stay covered with a damp towel to prevent drying and cracking.
- The flour paste acts as a glue to seal the spring rolls securely; don't skip this step to avoid filling leakage.
- Frying in small batches prevents overcrowding and uneven cooking.
- Air frying is a great lower-oil alternative and still produces crispy rolls.
- Customize dipping sauces based on your taste preferences; try spicy mustard or ranch for variety.
- If freezing, do not thaw rolls before cooking; cook directly from frozen for best texture.
Nutrition
- Serving Size: 1 roll
- Calories: 260 kcal
- Sugar: 2 g
- Sodium: 450 mg
- Fat: 17 g
- Saturated Fat: 7 g
- Unsaturated Fat: 8 g
- Trans Fat: 0.5 g
- Carbohydrates: 14 g
- Fiber: 1 g
- Protein: 12 g
- Cholesterol: 45 mg


Leave a Reply