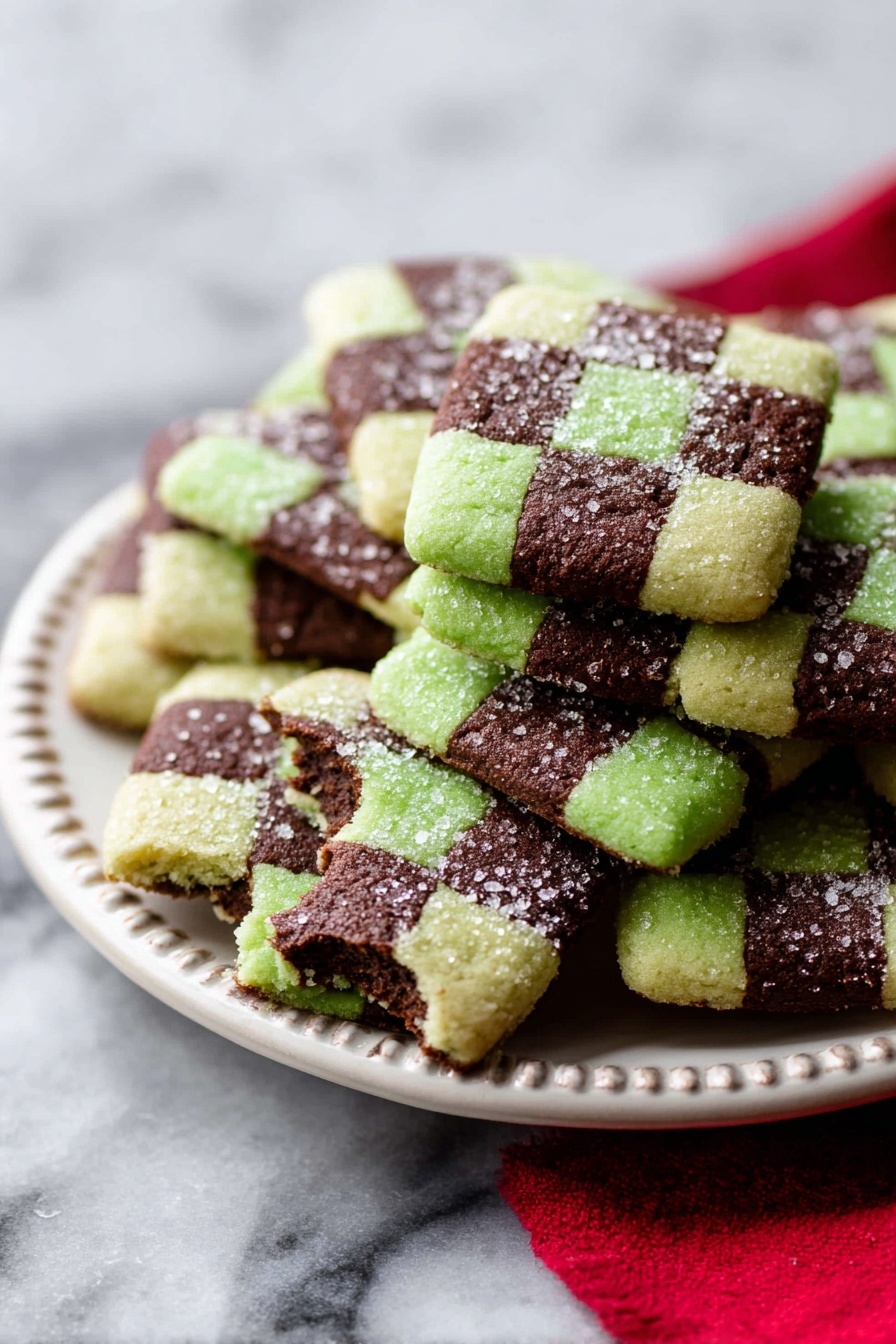
There’s something utterly magical about the blend of crisp chocolate and refreshing mint in a visually striking pattern. This Mint Chocolate Checkerboard Cookies Recipe brings that magic straight into your kitchen — while also giving you a fabulous way to impress with beautiful, handmade treats that taste as good as they look.

Jump to:
- Why You'll Love This Recipe
- Ingredients & Why They Work
- Make It Your Way
- Step-by-Step: How I Make Mint Chocolate Checkerboard Cookies Recipe
- Top Tip
- How to Serve Mint Chocolate Checkerboard Cookies Recipe
- Make Ahead and Storage
- Frequently Asked Questions:
- Final Thoughts
- Mint Chocolate Checkerboard Cookies Recipe
Why You'll Love This Recipe
Honestly, these cookies are a total showstopper. The checkerboard pattern is so fun to assemble, and the mint and chocolate flavors just sing together perfectly. Every bite offers that perfect combination of soft, buttery cookie with a cool, refreshing twist and a deep cocoa finish.
- Visual Wow Factor: The checkerboard pattern looks impressive but is easier to create than you’d think once you get the hang of slicing and layering the dough strips.
- Perfect Flavor Balance: The mint isn’t overpowering, and the cocoa adds richness—it’s a deliciously balanced pairing every time.
- Texture That’s Just Right: They come out crisp-edged but tender inside, with a little sparkle from a sugar sprinkle on top if you use the egg wash.
- Great for Gifting or Parties: They store well, freeze well, and instantly elevate any cookie platter with their unique look.
Ingredients & Why They Work
Each ingredient in this recipe plays a crucial role in creating the perfect texture and flavor. Plus, they’re mostly pantry staples, so you might already have everything on hand. I love when a fancy-looking cookie uses everyday ingredients!
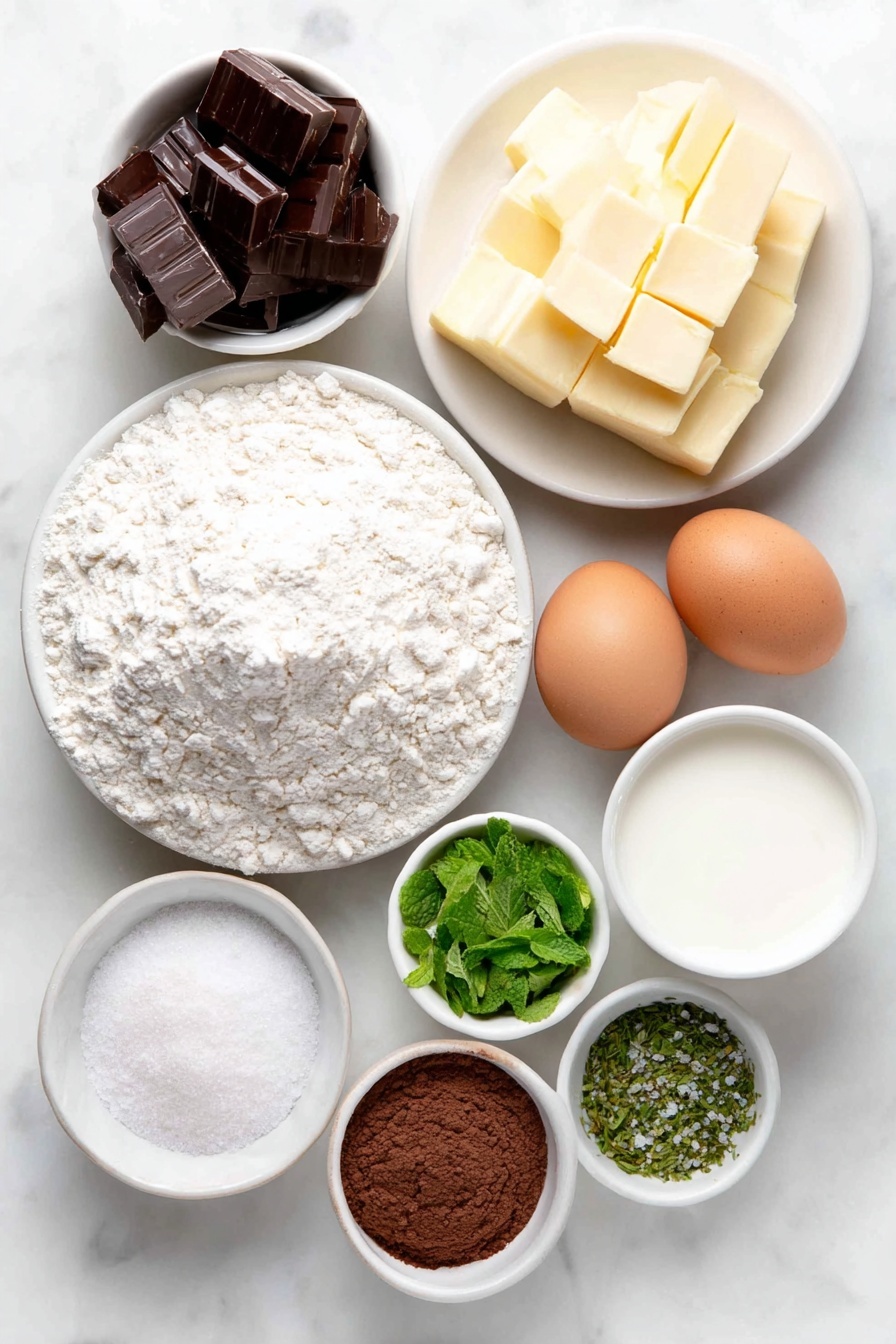
- All-purpose flour: The sturdy base for the dough that creates a tender crumb but holds the checkerboard shape well.
- Baking powder: Gives a gentle lift, so the cookies aren’t dense but still keep their structure.
- Salt: Balances the sweetness and enhances the flavors of both mint and chocolate.
- Unsalted butter: Room temperature is key here for smooth creaming and that melt-in-your-mouth texture.
- Granulated sugar: Adds sweetness and helps create that lightly crisp exterior.
- Egg + egg yolk: Gives richness and helps bind the dough without making it cakey. Saving the extra egg white is perfect for the optional egg wash glaze.
- Pure vanilla extract: Deepens the flavor, rounding out the sweetness beautifully.
- Peppermint extract: The star of the mint dough — just a teaspoon to avoid overpowering while still giving a fresh, cool note.
- Green food dye (optional): Gives that classic mint color for an eye-catching cookie.
- Cocoa powder: Unsweetened cocoa is essential here to provide rich chocolate flavor without sweetness.
- Milk: Helps soften the chocolate dough just enough to easily shape it.
- Espresso powder (optional): Enhances the chocolate depth—trust me, it’s subtle but makes a noticeable difference.
- Coarse sugar (optional): For sprinkling on top to add sparkle and crunch when paired with the egg wash.
Make It Your Way
I like to play around a bit with the intensity of the mint and the thickness of the cookies. Sometimes I dial up the peppermint a bit more, and other times I swap out the green food coloring for a natural option or leave it out for a more understated look.
- Variation: For a fun twist, I’ve added a handful of mini chocolate chips to the chocolate dough once before assembling the checkerboard—it adds little bursts of melty chocolate without messing up the pattern.
- Dietary Modification: You can substitute almond flour for part of the all-purpose flour for a nuttier flavor and a slightly softer texture, but the pattern might be a little trickier to form.
- Seasonal Flair: Swap peppermint extract for orange zest in the non-chocolate dough for a vibrant citrus version with chocolate.
Step-by-Step: How I Make Mint Chocolate Checkerboard Cookies Recipe
Step 1: Cream and Combine the Dough
I start by whisking the dry ingredients—flour, baking powder, and salt—to make sure they’re evenly mixed. Then, I cream the butter and sugar until it’s light and fluffy; this usually takes about three minutes with my stand mixer. Adding the egg, yolk, and vanilla comes next, and I beat everything until it’s smoothly combined. When incorporating the dry ingredients, mixing on low speed is crucial to avoid overworking the dough, which can make the cookies tough.
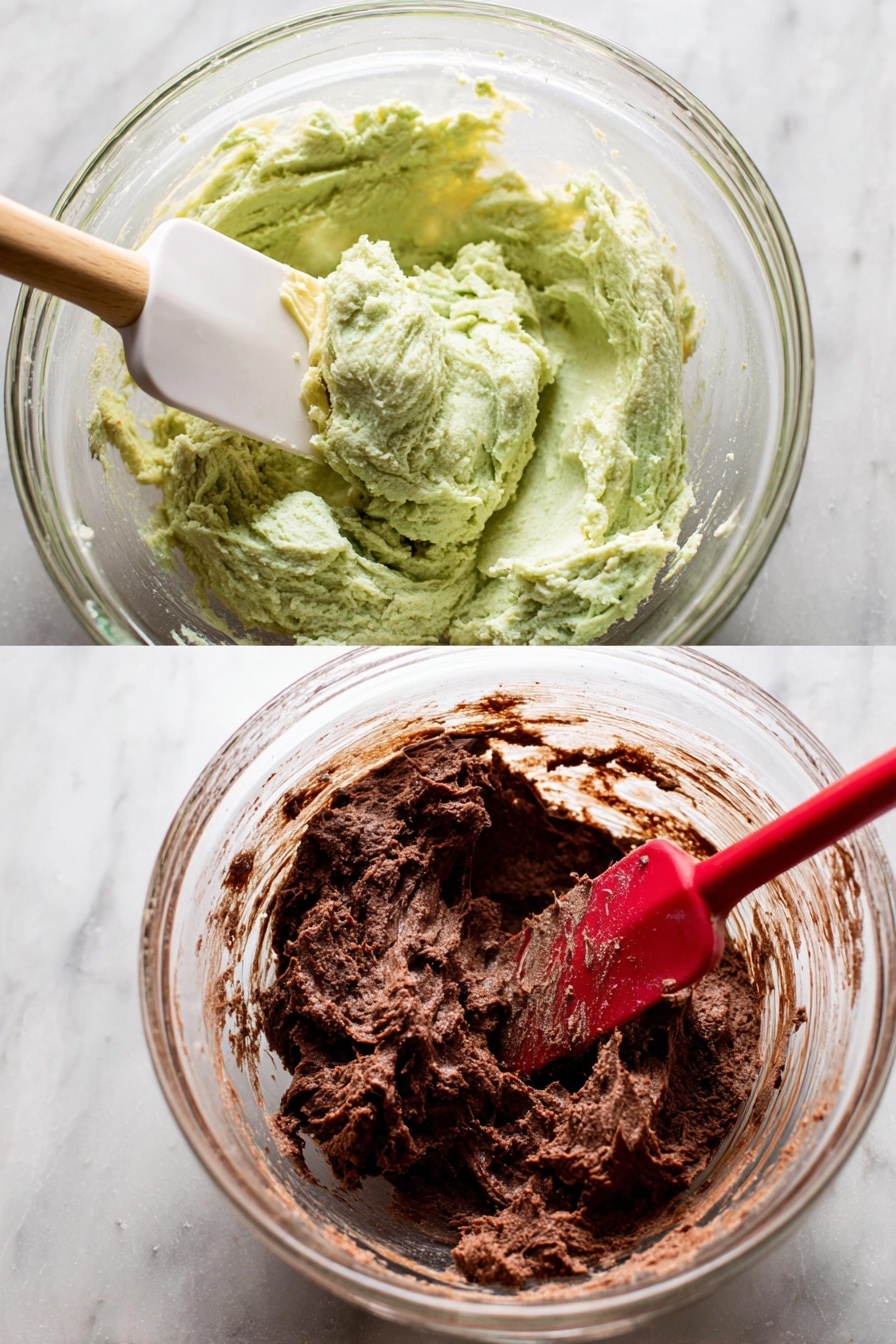
Step 2: Divide and Flavor the Dough
Once the dough base is ready, I divide it equally into two portions. Holding back just a little at first, I add peppermint extract and green food dye to one half for that cool mint vibe. For the other half, I mix in cocoa powder, milk, and a touch of espresso powder to deepen the chocolate flavor. The dough will thicken up, so be gentle as you mix on low speed to combine everything evenly.
Step 3: Shape, Chill, and Cut into Strips
This part can feel a bit messy, but trust me, patience pays off. With floured hands, I form each dough into a 6-inch long rectangle—roughly 2 inches wide and tall. Then into the fridge they go for exactly an hour. This chilling makes the dough less sticky but still pliable, which is essential. After chilling, I carefully slice each rectangle lengthwise and crosswise into 9 thin strips. Trimming the edges helps create clean, straight dough strips that stack neatly.
Step 4: Assemble the Checkerboard Blocks and Final Chill
Time to get creative! I alternate the mint and chocolate strips tightly together, pressing gently to avoid gaps. Making two checkerboard blocks—one starting with mint, the other with chocolate—keeps the pattern consistent when slicing the cookies. Wrapping and chilling these blocks again for at least two hours firms them up beautifully, making slicing into cookies a breeze.
Step 5: Slice, Optional Egg Wash, and Bake
With a sharp knife, I slice the blocks into cookies about half an inch thick. If you’re a stickler for neat squares like me, trimming any rounded edges here keeps things looking perfect. Brushing each cookie with the egg wash made from leftover whites and water gives a nice shimmer and helps the coarse sugar stick for a little extra crunch. Baking at 350°F for about 12-14 minutes yields cookies that are just lightly golden around the edges.
Top Tip
I remember the first time I tried making checkerboard cookies, I over-chilled the dough until it was rock hard, and slicing was a total nightmare. So here’s what really helps me get that perfect balance:
- Chill Timing: Only chill the shaped dough blocks until firm but still bendable—about 1 hour before cutting, then 2 hours once assembled.
- Knife Sharpness: Use a very sharp, thin-bladed knife for clean slices to keep the checkerboard edges crisp.
- Pressing Dough Strips: Don’t squash the strips, just press gently to fill gaps; squashing can distort the pattern.
- Trim for Neatness: Trimming the edges at each stage actually makes the whole shape easier to manage and produces gorgeous cookies.
How to Serve Mint Chocolate Checkerboard Cookies Recipe
Garnishes
I love brushing the cookies with that egg wash and sprinkling on coarse sugar—it not only adds sparkle but that subtle crunch that contrasts with the soft interior. For a seasonal touch, a tiny sprinkle of crushed peppermint candies on top is a winner too, especially around the holidays.
Side Dishes
These cookies pair beautifully with a tall glass of milk or a mint-infused hot chocolate for a fully immersive mint-chocolate experience. I’ve also enjoyed them alongside a scoop of vanilla ice cream for a simple dessert plate that feels extra special.
Creative Ways to Present
For parties, I like arranging the cookies in alternating checkerboard patterns on a large platter to amplify the visual "checkerboard" vibe. Wrapping individual cookies in cellophane and tying with a green ribbon makes charming gifts. Another personal favorite is stacking them with parchment paper between layers inside a decorative tin—helps keep them perfect and looks lovely!
Make Ahead and Storage
Storing Leftovers
I keep leftover cookies in an airtight container at room temperature for up to a week, and they hold their crisp edges and tender crumb beautifully. Avoid stacking too many on top of each other so they don’t smoosh the pattern.
Freezing
These cookies freeze wonderfully—wrap them tightly in plastic wrap and place into a freezer-safe bag or container. When I’m ready to serve, I thaw them overnight in the fridge and then let them come to room temperature before enjoying. Freezing the dough blocks before baking works too, which lets you bake fresh cookies whenever you want without starting from scratch.
Reheating
If you want to gently warm your cookies, I pop them in a 300°F oven for 5 minutes—this revives their soft center and crisp edges without drying them out. Just watch the time carefully because overbaking can make them lose that perfect tender texture.
Frequently Asked Questions:
Fresh mint won’t give the same concentrated flavor that peppermint extract provides, and the dough’s texture might be affected by added moisture. For the best traditional flavor and texture, stick to peppermint extract.
The egg wash is optional but highly recommended. It adds a beautiful shine to the cookies and helps the coarse sugar stick, giving you that irresistible crunch and sparkle. Without it, the cookies will still taste great but lack that extra bit of visual and textural appeal.
Using a sharp, long knife and a ruler or guide helps a lot. I also find chilling the dough so it’s firm but not frozen makes slicing much easier. Trimming any rounded edges gives the blocks a clean look which really helps the cookie presentation.
Absolutely! The checkerboard technique works great with other dough flavors. Try swapping the mint dough for lemon, vanilla, or even a spiced dough, paired with chocolate or something like cinnamon. It’s a fun canvas for your creativity!
Final Thoughts
This Mint Chocolate Checkerboard Cookies Recipe has become one of my go-to recipes when I want to bake something that feels both sophisticated and fun. It’s a delicious way to spend a relaxed afternoon in the kitchen, and the payoff of stunning, flavorful cookies is truly satisfying. I’m excited for you to try these out and make them your own—because nothing beats sharing a plate of beautiful, homemade cookies with friends (or sneaking one or two while you think no one’s looking!).
Print
Mint Chocolate Checkerboard Cookies Recipe
- Prep Time: 4 hours 45 minutes
- Cook Time: 13 minutes
- Total Time: 5 hours
- Yield: 36 cookies
- Category: Dessert
- Method: Baking
- Cuisine: American
- Diet: Vegetarian
Description
Mint Chocolate Checkerboard Cookies are a visually stunning treat featuring alternating blocks of mint-flavored and chocolate-flavored dough. These butter-rich cookies have a delightful balance of refreshing peppermint and rich cocoa, perfect for impressing guests or enjoying with your favorite cup of tea or coffee.
Ingredients
Base Cookie Dough
- 2 and ½ cups (313g) all-purpose flour (spooned & leveled)
- ½ teaspoon baking powder
- ½ teaspoon salt
- 1 cup (16 Tbsp; 226g) unsalted butter, softened to room temperature
- 1 cup (200g) granulated sugar
- 1 large egg + 1 egg yolk, at room temperature (save extra egg white)
- 1 and ½ teaspoons pure vanilla extract
- Optional for topping: 1 Tablespoon (15ml) water and ¼ cup (50g) coarse sugar
Mint Dough
- 1 teaspoon peppermint extract
- Optional: 1 drop green food dye
Chocolate Dough
- 2 Tablespoons (10g) unsweetened natural or dutch-process cocoa powder
- 1 Tablespoon (15ml) milk
- Optional: 1 teaspoon espresso powder
Instructions
- Make the dough: Whisk the flour, baking powder, and salt together in a medium bowl and set aside.
- Cream butter and sugar: In a large bowl, use a hand mixer or stand mixer with paddle attachment to beat the softened butter and granulated sugar on medium-high speed for about 3 minutes until creamy. Add the egg, egg yolk, and vanilla extract, then beat on high speed for 1 minute until combined, scraping the bowl as needed.
- Add dry ingredients: Mix the dry flour mixture into the wet ingredients on low speed until just combined forming a thick and sticky dough. Remove from the mixing bowl.
- Divide dough in half: Split the dough into two equal portions, approximately a bit less than 2 cups each.
- Make the mint dough: Place one half back into the mixing bowl. Add peppermint extract and a drop of green food dye. Beat on low speed until combined, adding more dye if desired. Remove from the bowl.
- Make the chocolate dough: Place the other half of dough back into the bowl. Add cocoa powder, milk, and optional espresso powder. Beat on low speed until fully combined.
- Shape and chill dough: On a lightly floured surface, form each dough half into a 6-inch long rectangle, 2 inches wide and 2 inches tall. Wrap both in plastic or foil and refrigerate for 1 hour until dough is less sticky but still pliable.
- Shape checkerboard pattern: Remove chilled doughs and cut each block lengthwise into 3 strips, then each strip into thirds to get 9 thin strips per dough. Trim edges for neatness. Alternate placing strips of mint and chocolate dough side by side in rows, stacking and pressing firmly to form two checkerboard blocks, starting with mint dough on one block and chocolate on the other.
- Chill assembled dough blocks: Wrap checkerboard dough blocks and refrigerate for 2 more hours to firm up, up to 4 days.
- Preheat oven and prepare baking sheets: Set oven to 350°F (177°C) and line two baking sheets with parchment paper or silicone mats.
- Slice and bake cookies: Slice each dough block into ½-inch thick cookies (about 12 per block) or thinner ⅓-inch slices (about 18 per block). Trim edges if desired for neat squares. Place cookies 2-3 inches apart on baking sheets. Optionally brush with egg wash made from saved egg white mixed with water and sprinkle coarse sugar on top.
- Bake and cool: Bake cookies for 12-14 minutes until edges are lightly browned. Remove from oven and cool on baking sheets for 5 minutes before transferring to wire racks to cool completely.
- Storage: Store cookies covered at room temperature for up to 1 week.
Notes
- Make Ahead: Baked cookies freeze well for up to 3 months; thaw overnight in the refrigerator before serving. Checkerboard dough blocks can be refrigerated up to 4 days or frozen up to 3 months.
- Egg Wash: Mix saved egg white with 1 tablespoon water to brush on cookies for a sparkling, crunchy topping before baking.
- Trimming: Trimming edges of dough strips, blocks, and cookies makes for neat checkerboard shapes. Leftover dough scraps can be rolled out and baked separately.
- Colors: Use gel food coloring for vibrant mint dough color; start with a small drop to avoid staining.
- Handling Dough: Dough should be chilled but pliable for shaping; avoid over-chilling to prevent cracking when assembling.
Nutrition
- Serving Size: 1 cookie
- Calories: 150 kcal
- Sugar: 12 g
- Sodium: 85 mg
- Fat: 8 g
- Saturated Fat: 5 g
- Unsaturated Fat: 2 g
- Trans Fat: 0 g
- Carbohydrates: 18 g
- Fiber: 1 g
- Protein: 2 g
- Cholesterol: 30 mg


Leave a Reply