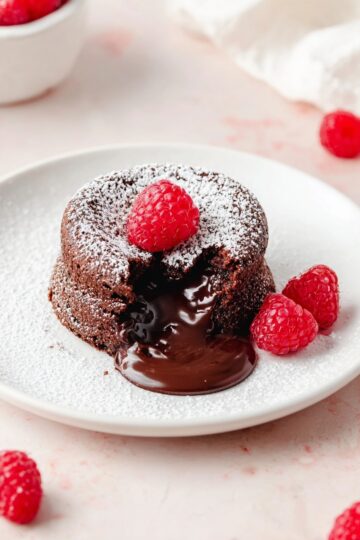
Craving an indulgent, gooey dessert that melts in your mouth? You’re going to love this Peanut Butter Chocolate Lava Cakes Recipe — rich semi-sweet chocolate and creamy peanut butter join forces to create pure magic in every bite, all ready in just 35 minutes!

Jump to:
- Why You'll Love This Recipe
- Ingredients & Why They Work
- Make It Your Way
- Step-by-Step: How I Make Peanut Butter Chocolate Lava Cakes Recipe
- Top Tip
- How to Serve Peanut Butter Chocolate Lava Cakes Recipe
- Make Ahead and Storage
- Frequently Asked Questions:
- Final Thoughts
- Peanut Butter Chocolate Lava Cakes Recipe
Why You'll Love This Recipe
Honestly, this recipe quickly became one of my favorites to whip up when I want to impress guests or just treat myself after a long day. It combines luxurious textures with familiar, comforting flavors that are impossible to resist.
- Quick and Easy: From start to finish in just 35 minutes, perfect for last-minute dessert plans.
- Decadent Center: Molten peanut butter oozes out, adding a creamy, nutty surprise inside.
- Simple Ingredients: No fancy or hard-to-find items—just high-quality basics you probably already have.
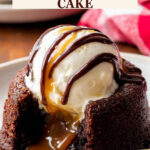
- Customizable Serving: Top with ice cream or drizzle with chocolate syrup for extra indulgence.
Ingredients & Why They Work
Choosing the right ingredients here really makes a difference, especially when it comes to the chocolate and peanut butter. A good-quality semi-sweet chocolate ensures a deep, rich flavor, while creamy commercial peanut butter gives you that perfect smooth center without overpowering the chocolate.
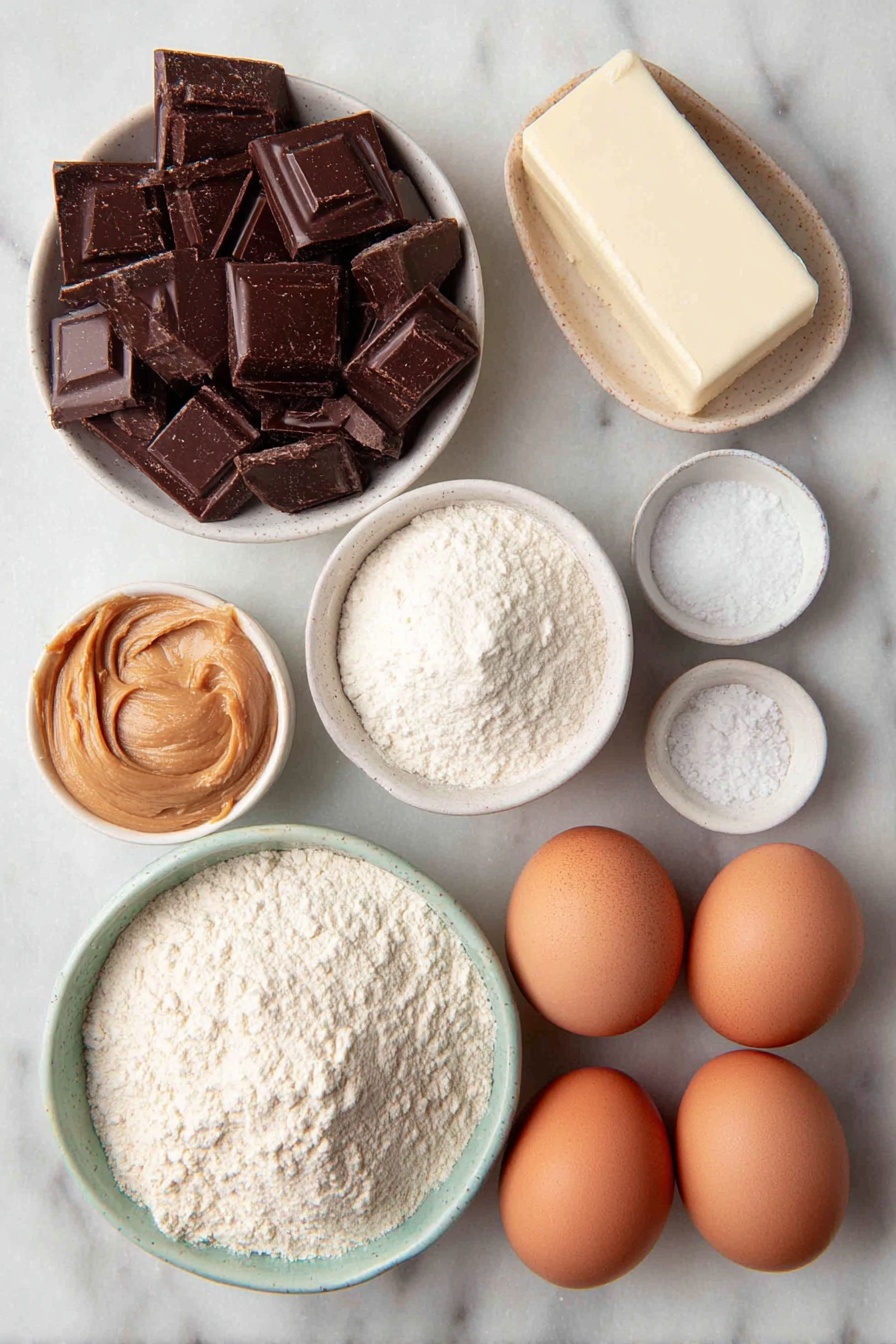
- High quality semi-sweet chocolate: I prefer trusted brands like Ghirardelli or Lindt because they melt smoothly and taste amazing.
- Unsalted butter: To control the saltiness and enhance richness without overpowering the chocolate.
- All-purpose flour: Just a small amount to give the cakes structure without making them cakey.
- Confectioners’ sugar: Provides sweetness and a delicate texture to the batter.
- Salt: Just a pinch to balance the sweetness and bring out the chocolate flavor.
- Eggs and egg yolks: Essential for the silky, fudgy texture and helps the cakes rise slightly.
- Creamy peanut butter: Opt for smooth commercial peanut butter like Jif or Skippy for the best molten center.
- Optional toppings: Ice cream, melted peanut butter, or chocolate syrup elevate the dessert to something truly special.
Make It Your Way
One of the best things about this Peanut Butter Chocolate Lava Cakes Recipe is how easily you can customize it to match your cravings or occasion. Whether you want to switch up the nuts, add a seasonal twist, or keep it classic, the possibilities are endless!
- Nut-Free Variation: If allergies are a concern, swap out the peanut butter for a sunflower seed butter. I tried this for a friend’s birthday, and the cakes still had that luscious molten center while being completely nut-free!
- Seasonal Twist: Adding a pinch of cinnamon or a drop of peppermint extract to the batter before baking adds a warm festive flair that’s perfect for winter holidays — a lovely surprise that blends brilliantly with the chocolate and peanut butter flavors.
- Plain Chocolate Lava Cakes: For those who prefer pure chocolate indulgence without peanut butter, simply omit the peanut butter layer. The texture and richness remain divine, baking for the same amount of time at 425°F (218°C).
- Muffin Pan Adaptation: No ramekins? No problem! Use a muffin pan, greased and dusted with cocoa powder, baking for 8-10 minutes. You’ll get 6 smaller lava cakes—great for sharing or portion control.
Step-by-Step: How I Make Peanut Butter Chocolate Lava Cakes Recipe

Step 1: Prep Your Ramekins Like a Pro
Start by spraying four 6-ounce ramekins generously with nonstick cooking spray, then dust them lightly with cocoa powder. This simple step ensures your lava cakes will slide out effortlessly after baking. Take your time here—nothing kills the wow factor quicker than a cake that sticks stubbornly to the dish.
Step 2: Get Your Oven Ready
Preheat your oven to a toasty 425°F (218°C). High heat is key to achieving that perfect contrast: firm but cakey edges surrounding a molten, oozy center. While it warms up, you can move on to melting the chocolate and butter, so everything runs smoothly.
Step 3: Melt Chocolate and Butter to Velvety Perfection
Coarsely chop 6 ounces of your favorite semi-sweet chocolate—think Ghirardelli or Lindt for that rich, dependable flavor. Place the chocolate and ½ cup (8 Tbsp; 113g) of unsalted butter in a medium heat-proof bowl. Microwave on high in 10-second bursts, stirring well after each time, until the mixture is completely smooth and silky. Setting this aside allows things to cool just enough before mixing in the eggs.
Step 4: Combine Dry and Wet Ingredients Gently
In a small bowl, whisk together ¼ cup (31g) all-purpose flour, ½ cup (60g) confectioners’ sugar, and ⅛ teaspoon salt. Separately, whisk 2 large eggs and 2 large egg yolks until combined. Slowly add the dry ingredients first, then the eggs into the warm chocolate mixture, stirring carefully with a silicone spatula or wooden spoon. If any lumps remain, gently smooth the batter with a whisk—remember, it should be slightly thick, not runny.
Step 5: Fill Ramekins and Nestle in Peanut Butter
Evenly spoon the chocolate batter into each prepared ramekin, filling them about three-quarters full. Add 2 teaspoons (about 10.5g) of creamy peanut butter on top of each, pressing it just a bit into the batter—you want it nestled but still peeking through. This little touch creates the magical molten peanut butter core everyone will love.
Step 6: Bake for Gooey Goodness
Arrange your filled ramekins on a baking sheet and slide into the preheated oven. Bake for precisely 13 minutes until the sides look set and firm but the tops remain just a bit soft and delicate. This timing is crucial to get that molten texture—overbake and you lose the lava effect; underbake and they won’t hold shape.
Step 7: Flip and Serve While Warm
Once baked, let the cakes rest in their ramekins for 1 minute. Then, using oven mitts, cover each ramekin with an inverted plate and carefully flip it so the cake releases onto the plate. The peanut butter center should ooze out beautifully, a chocolaty and nutty masterpiece. Serve immediately with optional ice cream, drizzle with melted peanut butter or chocolate syrup, and watch your guests' eyes light up!
Top Tip
To nail the perfect Peanut Butter Chocolate Lava Cakes Recipe every single time, a few key tips make all the difference. These insights come from my own kitchen experiments and the little tweaks that took my cakes from tasty to irresistible.
- Ramekin Prep: Make sure to generously spray and dust the ramekins with cocoa powder. This simple step ensures your lava cakes slide out smoothly, preserving their molten center and beautiful form.
- Peanut Butter Choice: Use a creamy commercial peanut butter like Jif or Skippy. I’ve learned the hard way that natural or crunchy versions don’t melt properly inside, changing the texture and flavor balance you want.
- Watch the Bake Time: Keep a close eye on those 13 minutes of baking. The edges should be firm while the center remains soft to achieve that luscious molten core everyone loves.
- Batter Prep Ahead: You can prepare your batter through step 4 a day in advance and refrigerate it. Just bring it back to room temperature before filling ramekins to keep the baking consistent and delicious.
How to Serve Peanut Butter Chocolate Lava Cakes Recipe
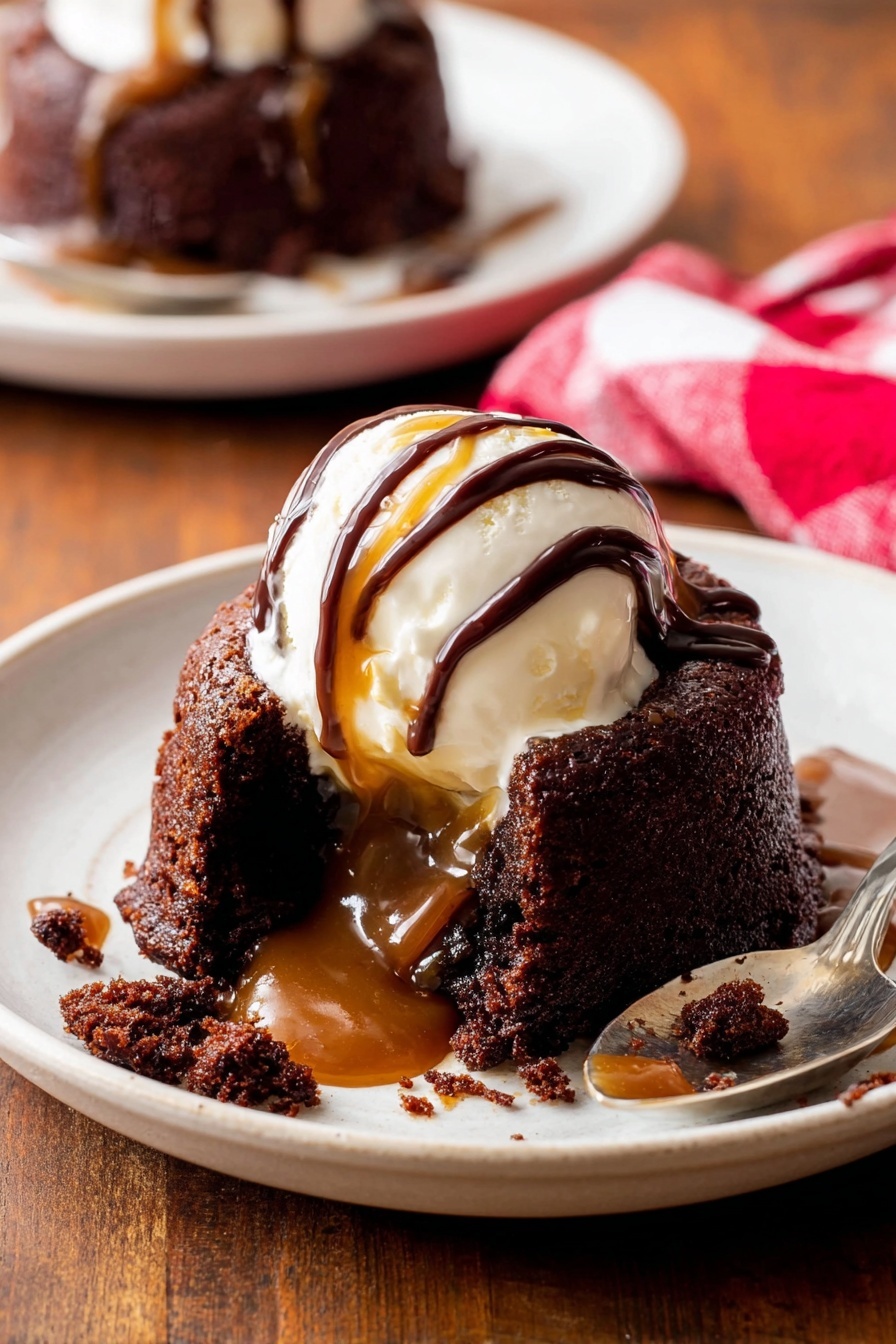
Garnishes
The magic of these peanut butter chocolate lava cakes shines brightest when paired with thoughtful garnishes. A scoop of creamy vanilla or coffee ice cream adds a cool contrast to the warm cake. Drizzle some melted peanut butter or rich chocolate syrup on top to elevate their decadent flavor. If you want a fresh twist, sprinkle a pinch of flaky sea salt or chopped roasted peanuts for a subtle crunch and flavor pop.
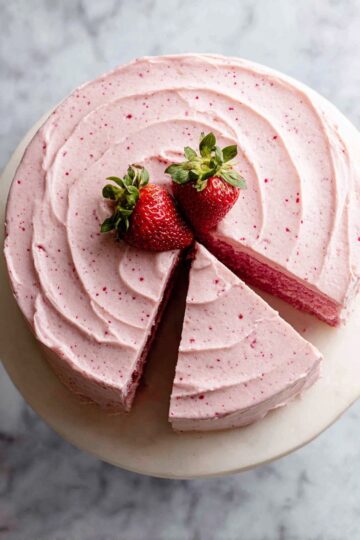
Side Dishes
Complement your indulgent desserts with light and fresh sides like sliced strawberries or raspberries. Their bright tartness cuts through the richness of the cake beautifully. For a heartier touch, serve alongside a small bowl of whipped cream or a dollop of yogurt-based mousse to add creaminess without overpowering the intense peanut butter-chocolate duo.
Make Ahead and Storage
Storing Leftovers
If you have any leftover Peanut Butter Chocolate Lava Cakes (though they rarely stick around!), store them in an airtight container in the refrigerator for up to 2 days. Keeping them chilled helps maintain their rich texture without drying out.
Freezing
These cakes freeze well if you want to make them ahead for special occasions. Wrap each cooled cake tightly in plastic wrap and then place inside a freezer-safe bag or container. Freeze for up to 1 month. When ready to enjoy, thaw overnight in the fridge before reheating gently.
Reheating
Reheat your lava cakes carefully to preserve that molten center. Microwave each cake for about 20-25 seconds or warm them in a 350°F (175°C) oven for 7-8 minutes. Avoid overcooking to keep the inside gooey and luscious.
Frequently Asked Questions:
For the best texture and molten center, creamy peanut butter is recommended. Crunchy peanut butter does not melt smoothly and can affect the gooey consistency of the lava cake.
No worries! You can use a muffin pan instead. Grease and dust 6 muffin cups with cocoa powder, fill the batter, and bake at 425°F (218°C) for 8-10 minutes to get 6 smaller lava cakes.
Yes! The batter can be made through step 4 and refrigerated tightly covered for up to one day. Be sure to bring it to room temperature before filling ramekins.
Look for firm and solid sides while the tops remain a bit soft and slightly wet-looking. The cakes bake for 13 minutes at 425°F (218°C) to achieve this delicate balance.
Final Thoughts
Making these Peanut Butter Chocolate Lava Cakes feels like treating yourself to a little slice of heaven each time. Their rich, gooey centers paired with the peanut butter surprise make them a beloved dessert for any occasion. Whether sharing with loved ones or indulging solo, these cakes bring warmth, comfort, and a touch of decadence that’s hard to beat. So go on, savor every bite and enjoy the simple joy of homemade chocolate and peanut butter bliss!
Print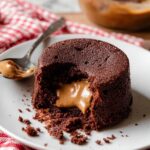
Peanut Butter Chocolate Lava Cakes Recipe
- Prep Time: 15 minutes
- Rest Time: 1 minute
- Cook Time: 13 minutes
- Total Time: 35 minutes
- Yield: 4 cakes
- Category: Dessert
- Method: Baking
- Cuisine: American
- Diet: Vegetarian
Description
Delight in rich, molten Peanut Butter Chocolate Lava Cakes that combine smooth semi-sweet chocolate with creamy peanut butter, baked to gooey perfection. Perfect for an indulgent dessert, these cakes feature a luscious peanut butter center and a fudgy chocolate exterior, ready in just 35 minutes.
Ingredients
Main Ingredients
- 6 ounces high quality semi-sweet chocolate, such as Ghirardelli or Lindt
- ½ cup (8 Tbsp; 113g) unsalted butter
- ¼ cup (31g) all-purpose flour (spooned & leveled)
- ½ cup (60g) confectioners’ sugar
- ⅛ teaspoon salt
- 2 large eggs
- 2 large egg yolks
- 8 teaspoons (42g) creamy peanut butter (about 2 teaspoons per cake)
Optional for Serving
- Ice cream
- Melted peanut butter
- Chocolate syrup for drizzling
Instructions
- Prepare Ramekins: Spray 4 6-ounce ramekins with nonstick cooking spray and dust with cocoa powder to ensure the cakes release easily after baking.
- Preheat Oven: Set your oven to 425°F (218°C) to make sure it reaches the perfect temperature for baking lava cakes.
- Melt Chocolate and Butter: Coarsely chop the chocolate and place it together with butter in a medium heat-proof bowl. Microwave on high in 10-second increments, stirring after each until smooth and fully melted. Set aside.
- Mix Dry and Wet Ingredients: In a small bowl, whisk together the flour, confectioners’ sugar, and salt. In another bowl, whisk the eggs and egg yolks until combined. Gradually add the flour mixture and eggs into the melted chocolate, stirring slowly with a silicone spatula or wooden spoon. Use a whisk gently to remove any lumps; batter will be slightly thick.
- Fill and Add Peanut Butter: Spoon the chocolate batter evenly into the prepared ramekins. Top each with 2 teaspoons of creamy peanut butter, pressing it slightly into the batter. Some peanut butter may still be visible.
- Bake: Place ramekins on a baking sheet and bake for 13 minutes until sides are firm but tops remain slightly soft.
- Invert and Serve: Let the cakes cool for 1 minute, then cover each ramekin with an inverted plate and carefully flip using oven mitts. The cakes should release easily. Serve immediately with optional ice cream and drizzled melted peanut butter or chocolate syrup.
Notes
- You can prepare the batter through step 4 up to one day ahead; cover tightly and refrigerate. Bring to room temperature before filling ramekins.
- Use creamy commercial peanut butter like Jif or Skippy; avoid natural or crunchy types and other nut butters for best results.
- If you prefer plain lava cakes without peanut butter, omit the peanut butter and bake the same amount of time.
- Use 6-ounce oven-proof ramekins for consistent baking results; alternate sizes may change baking time.
- If ramekins are unavailable, use a muffin pan greased and dusted with cocoa powder; bake for 10 minutes and yield will be 6 smaller cakes.
Nutrition
- Serving Size: 1 cake
- Calories: 480 kcal
- Sugar: 30 g
- Sodium: 110 mg
- Fat: 34 g
- Saturated Fat: 15 g
- Unsaturated Fat: 17 g
- Trans Fat: 0 g
- Carbohydrates: 40 g
- Fiber: 4 g
- Protein: 7 g
- Cholesterol: 135 mg
Leave a Reply